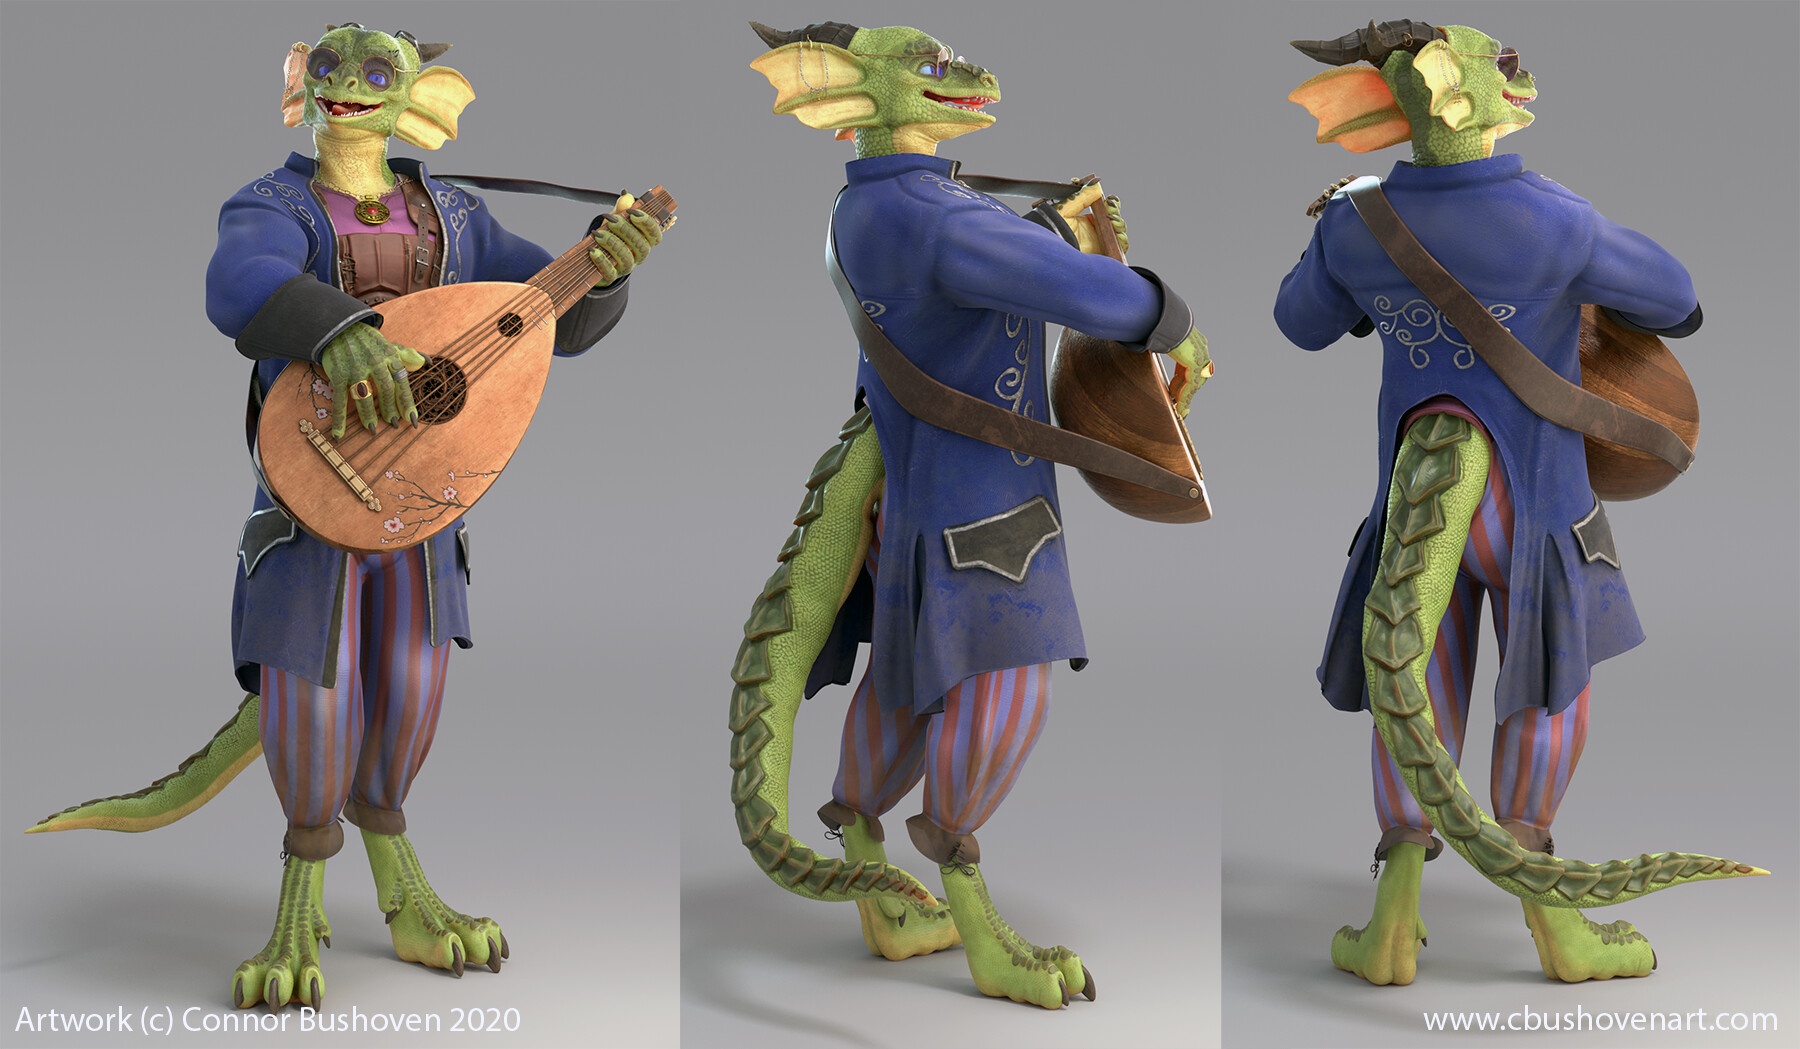
Enoch
This character, Enoch, was a passion project I developed as a portfolio piece over the months of November and December 2020. I developed him based on a Dungeons and Dragons character of mine. This project was extremely demanding but I'm extremely happy with the result! I hope to eventually rig him completely when the opportunity presents itself. He was easily the most difficult character I've worked on so far, but I enjoyed every minute of it!
Programs used include Maya, Zbrush, Marvelous Designer, Photoshop, After Effects, and Substance Painter.
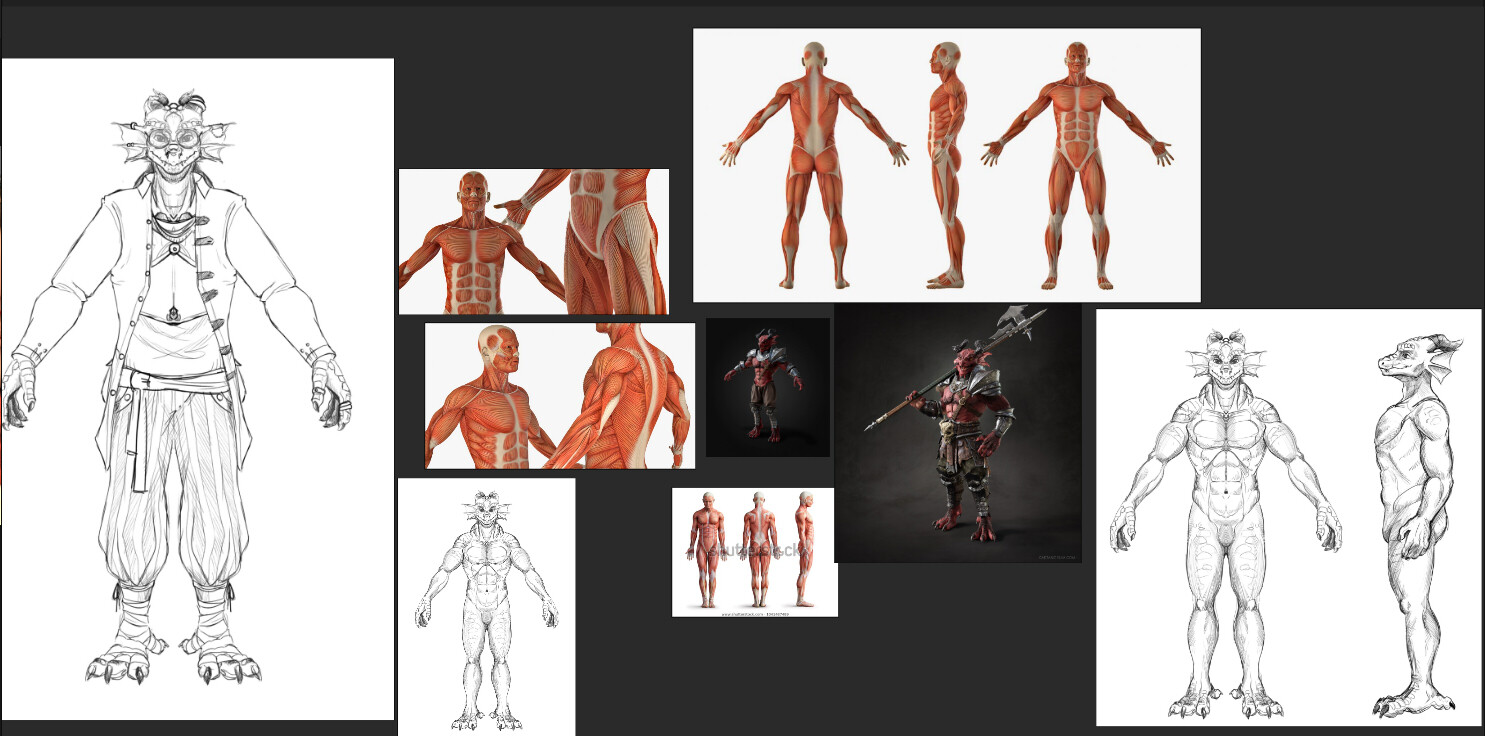
Since this character is a bit of a hybrid, I began this project with anatomical research--I looked everywhere from reptilian animals (mainly crocodiles and alligators) to humanoid anatomy. I also found similar 3D projects and did my own sketches.
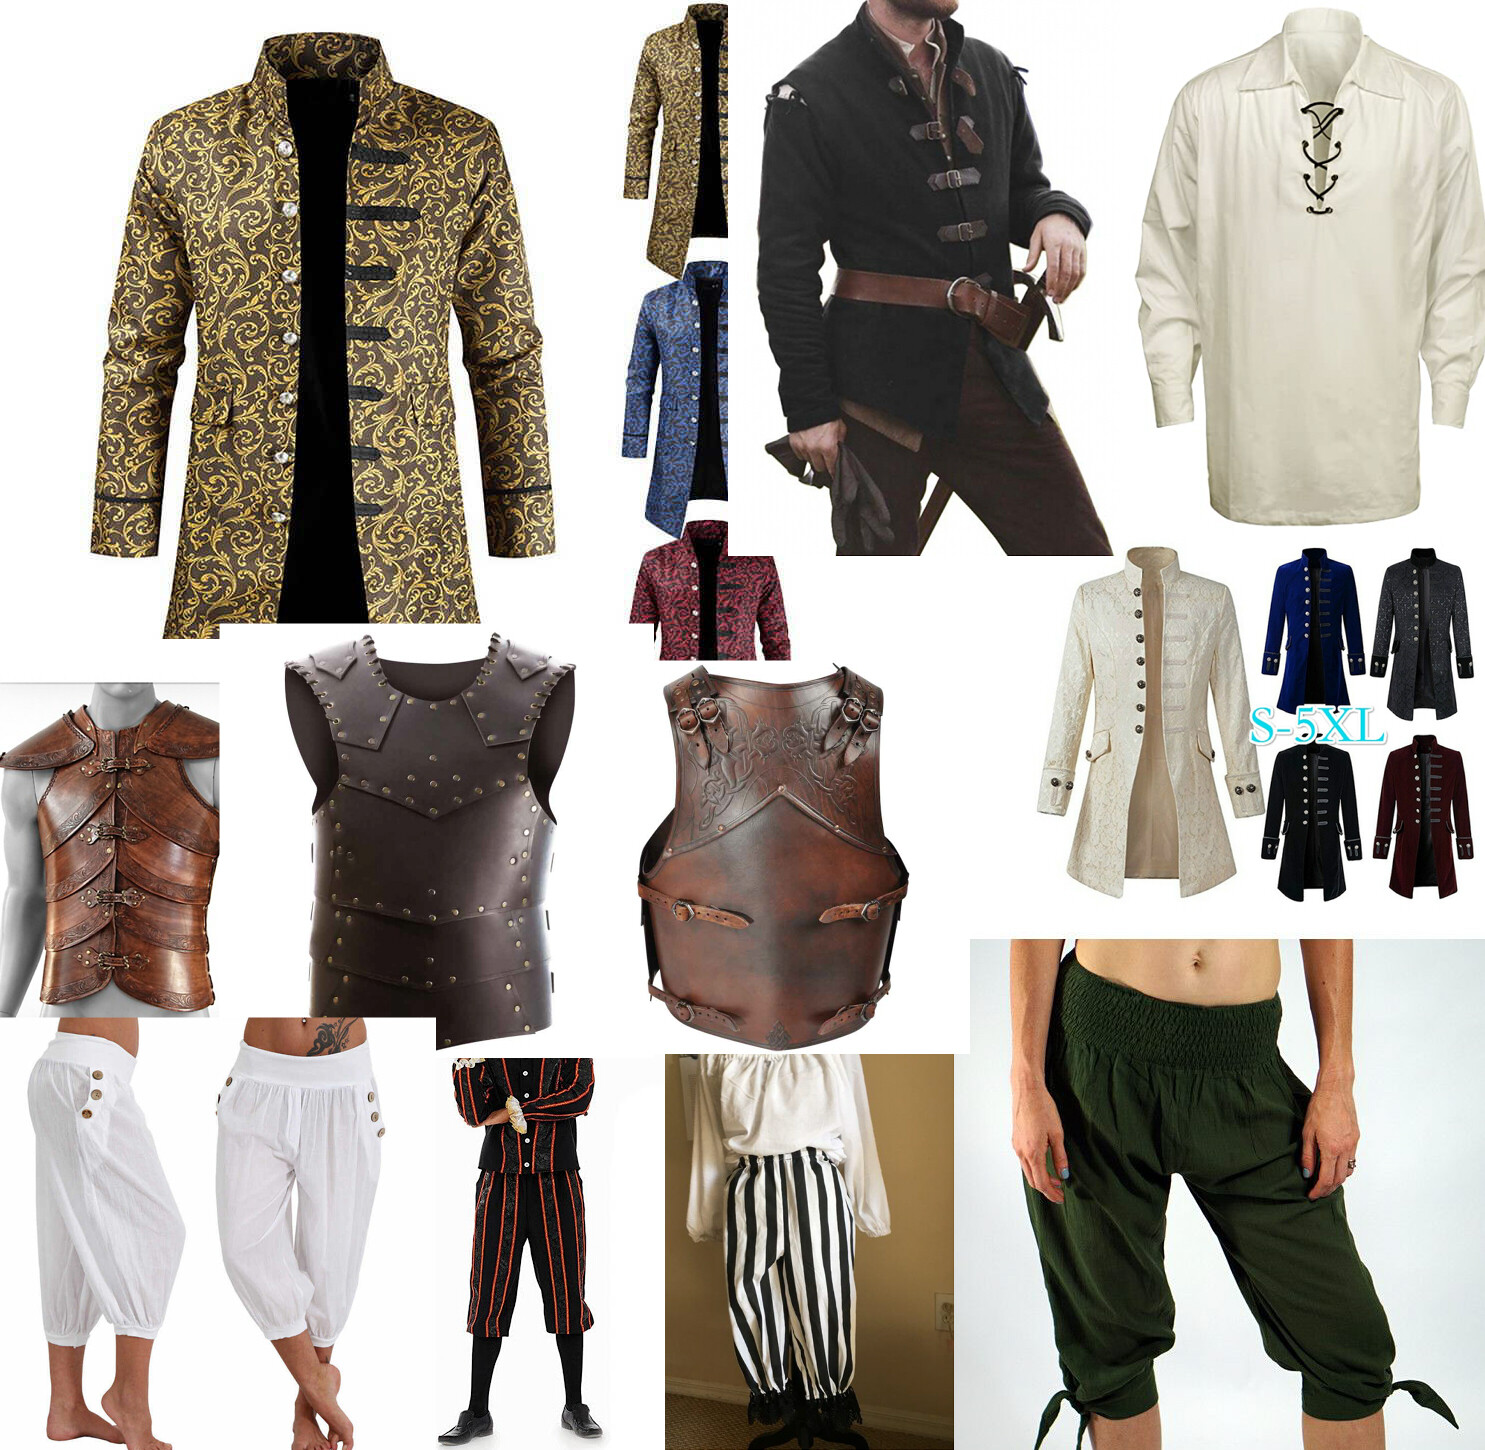
I also assembled a large amount of costume references that matched the style I was going for. The model is based on a Dungeons and Dragons character I play, so I wanted to convey his flashy sense of fashion through medieval-style clothing.

Once I had a sketch to base the blocking off of, I blocked the body out using polygon primitives in Maya. I then brought the meshes into Zbrush to adjust the shape further before dynameshing the character.
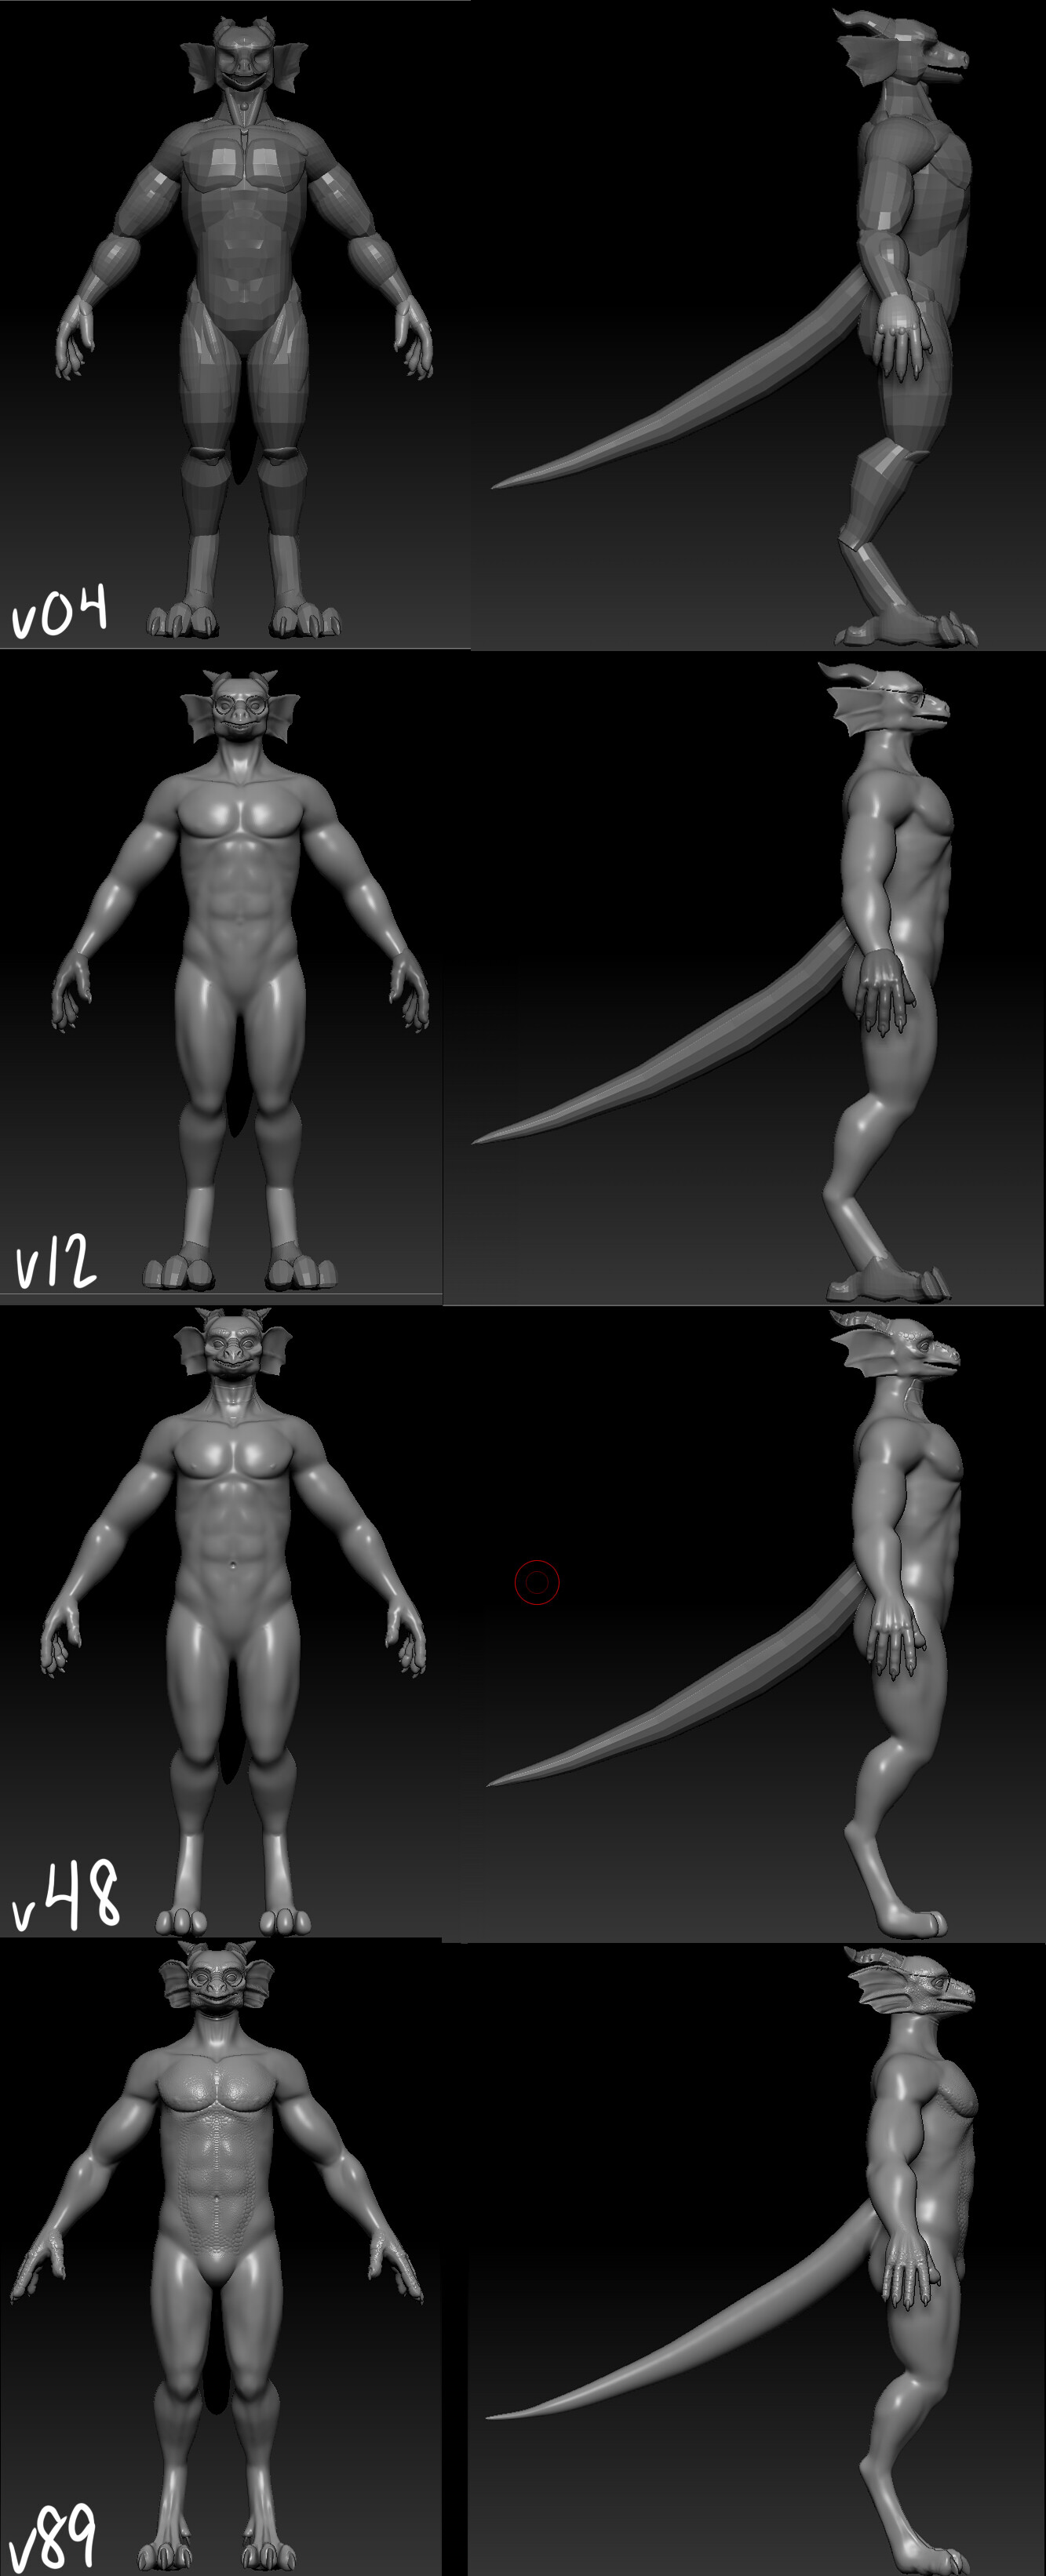
Once the blockout was in Zbrush, I slowly refined the body and sculpted the details based on my references, dynameshing as I went. I tweaked the proportions slightly and diverged from the original drawing to make the feet make more sense in 3D.
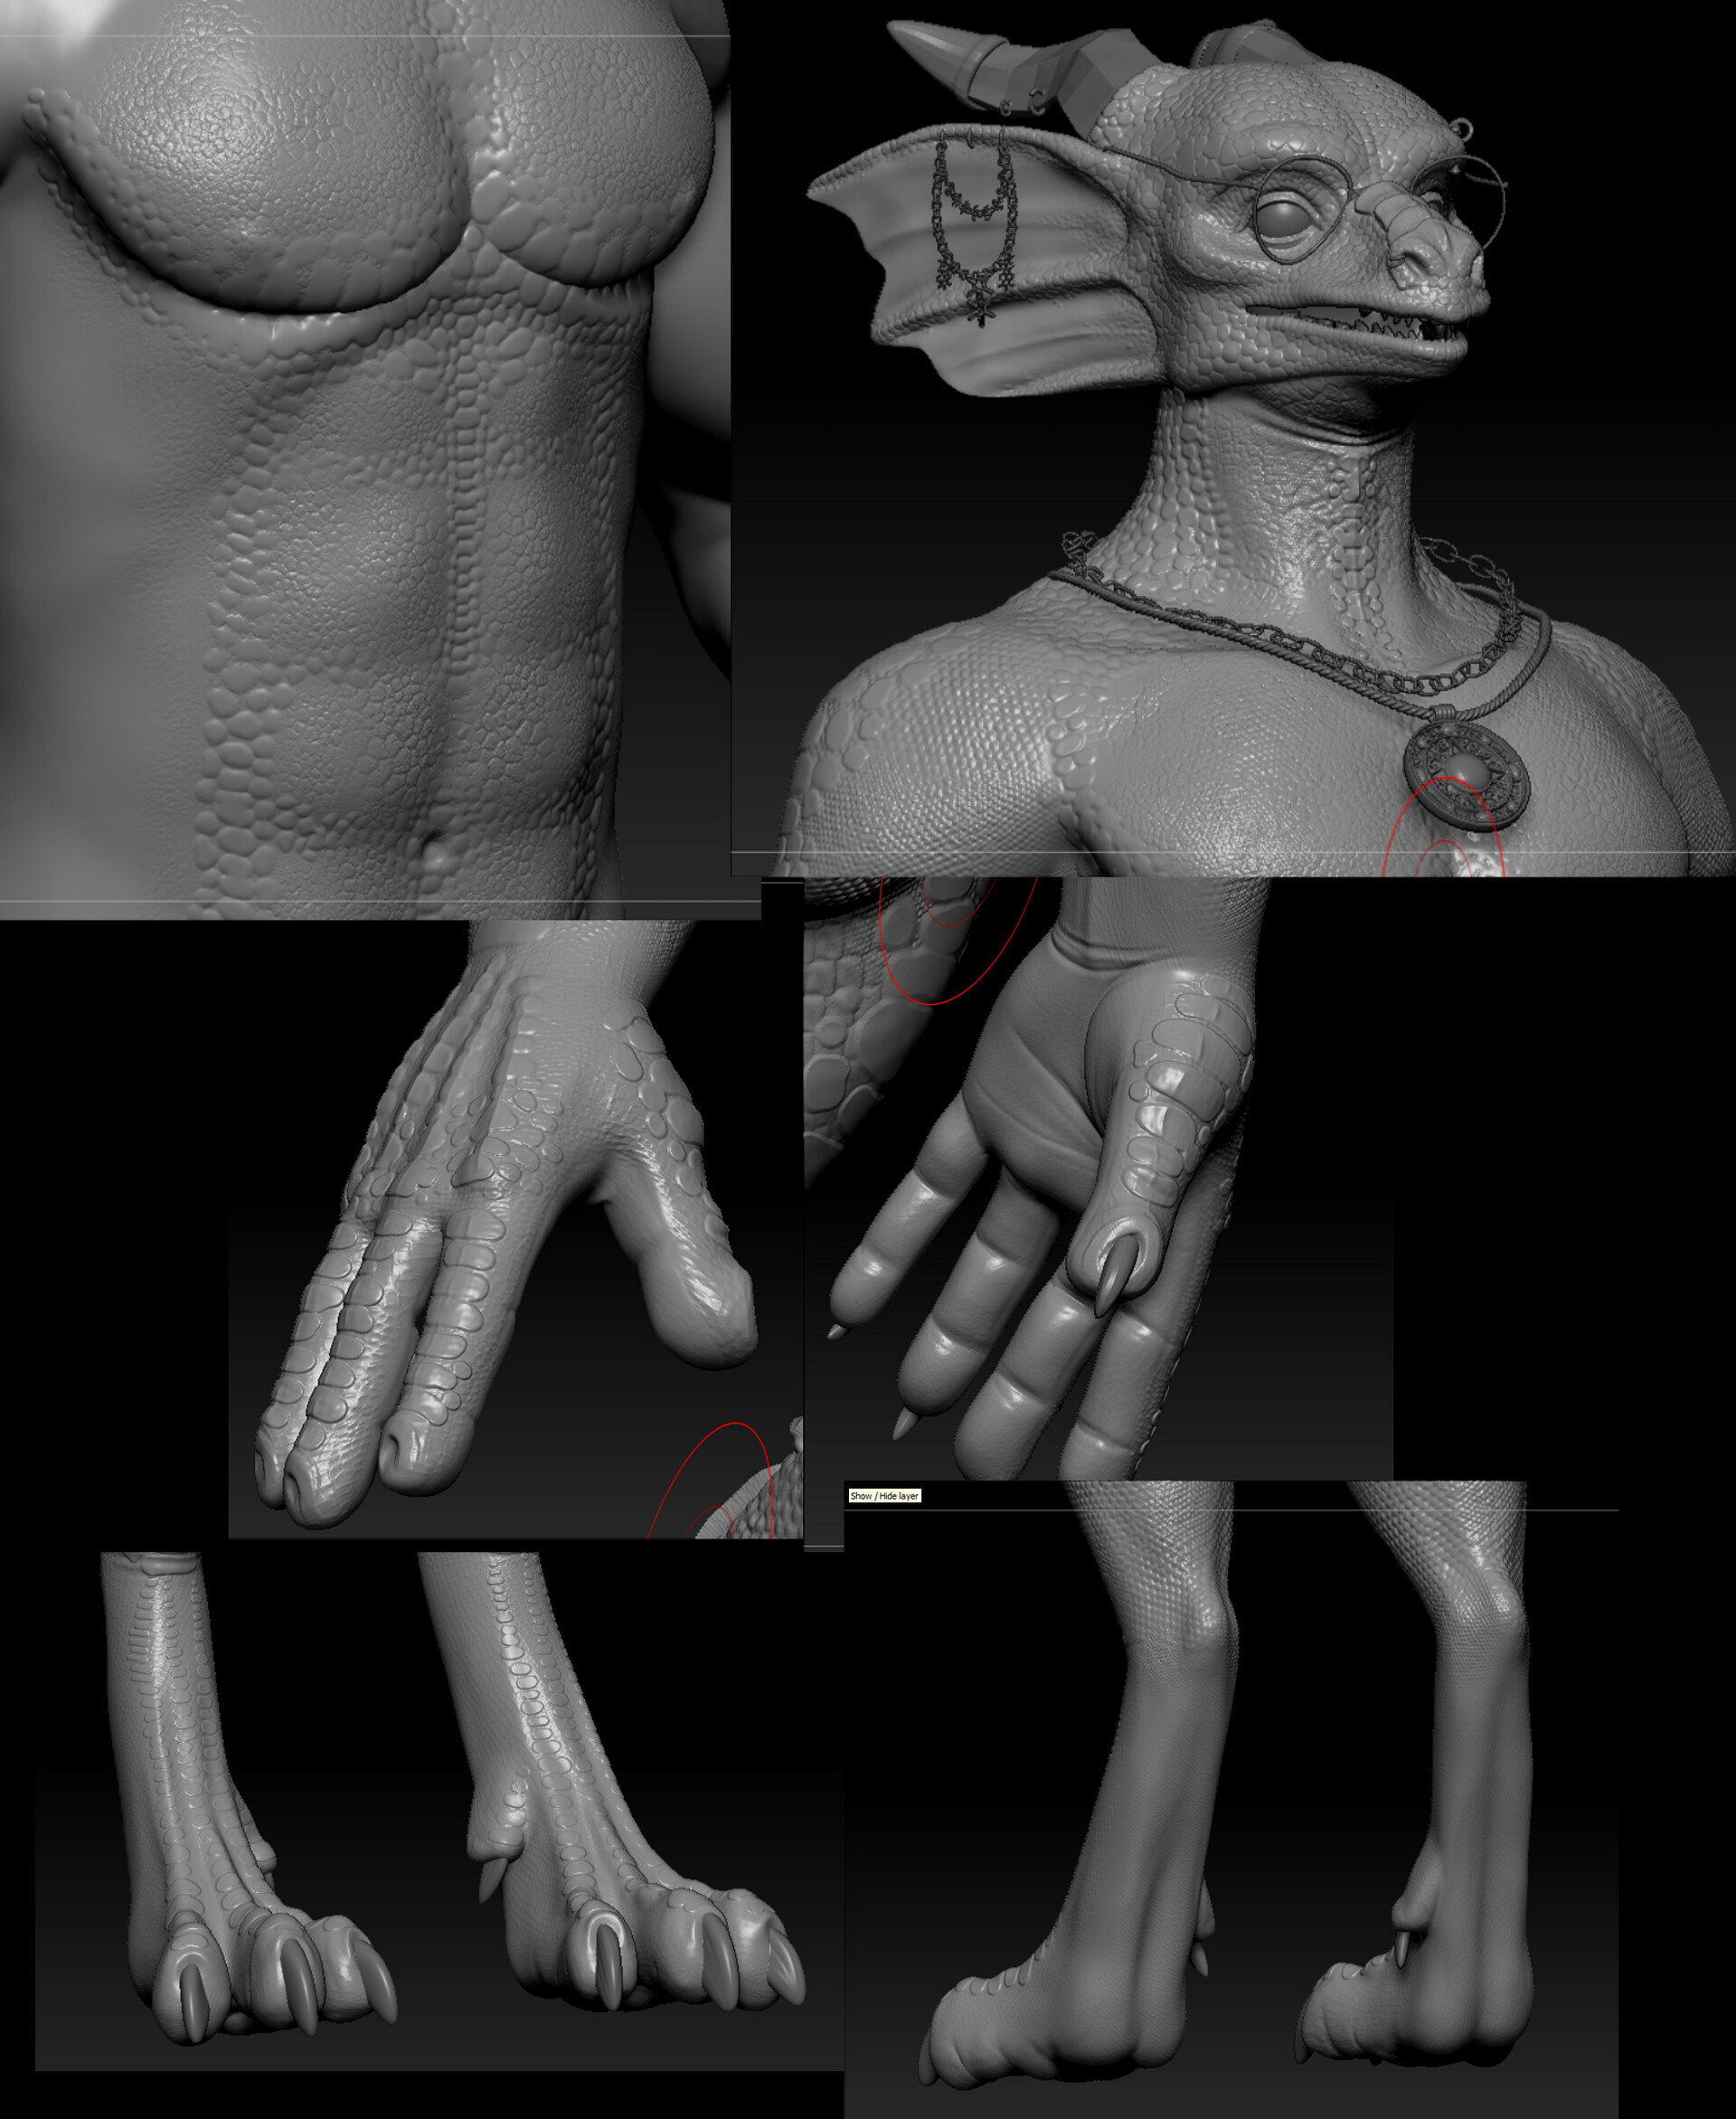
The next step was to tackle applying scales to the entire body. The process included doing individual scales (in the case of the face and hands) and using alphas to apply the texture. I used IMM brushes to create the chains and ropes for jewelry.

With the body more or less complete, I took the decimated mesh back into Maya for retopology. Then I imported this new mesh back into Zbrush to re-project the detail from the high-poly sculpt. I then UV'd him and baked the displacement maps for the body
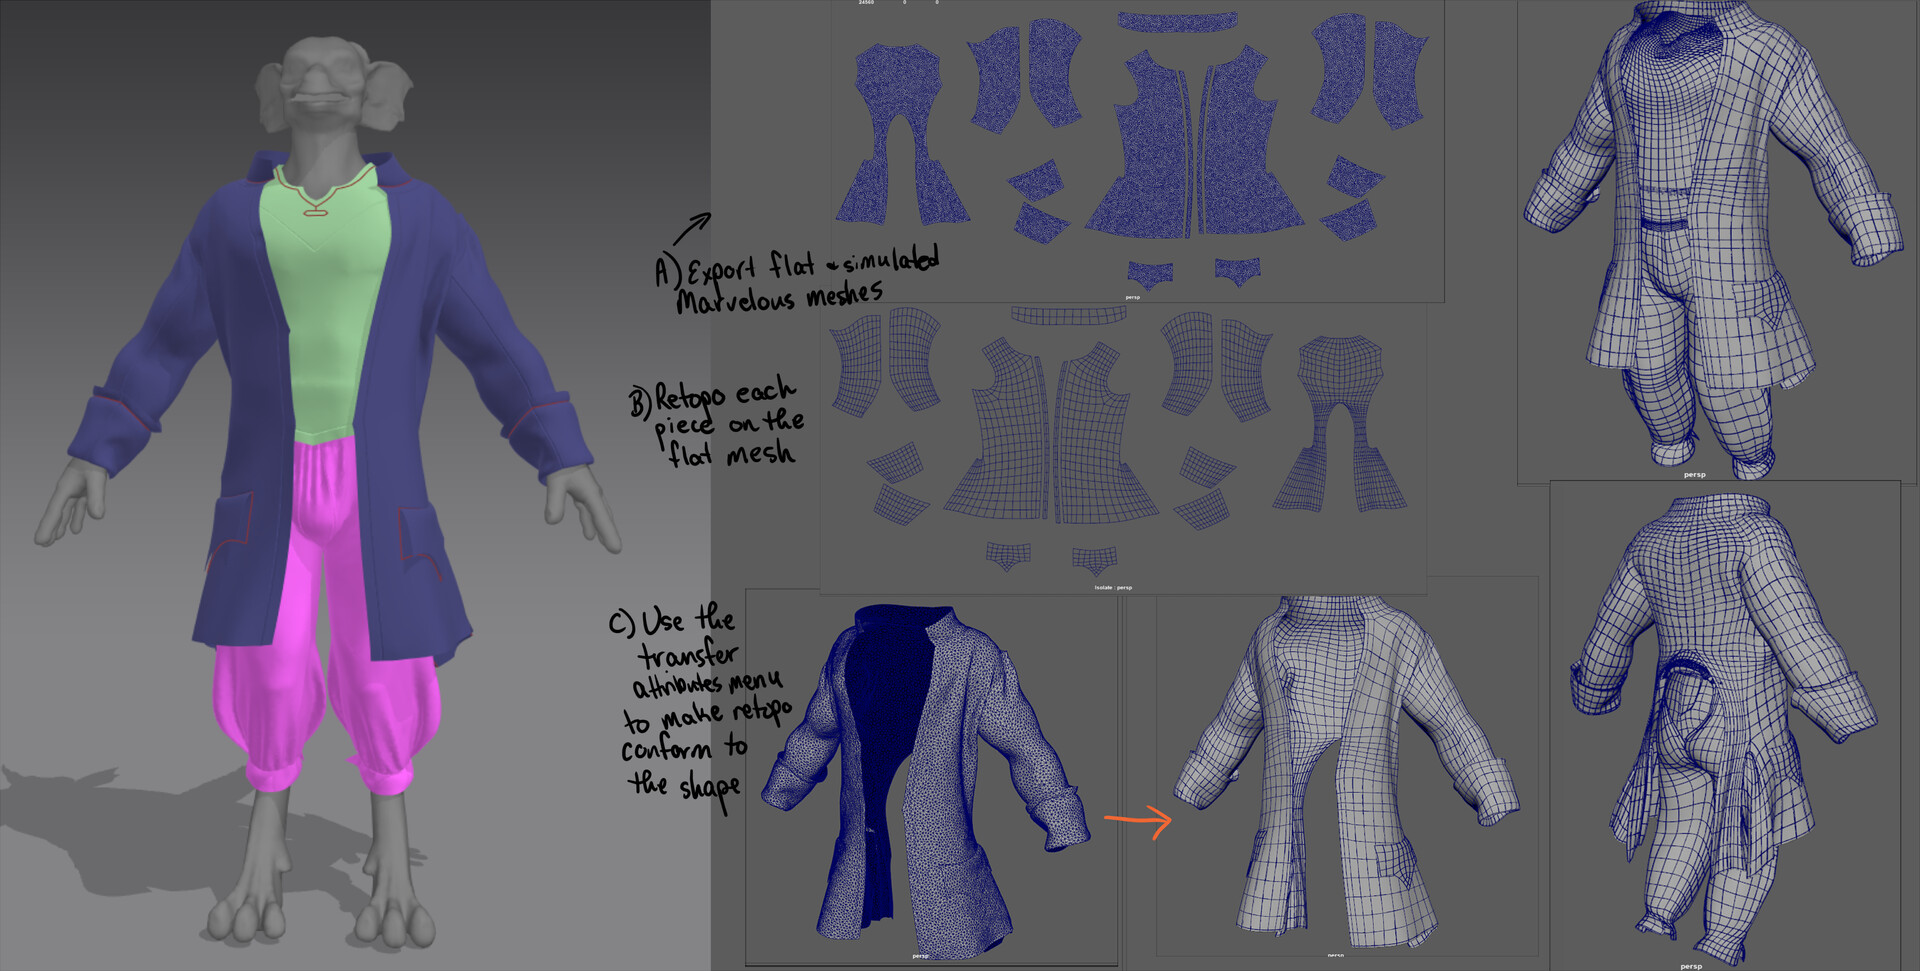
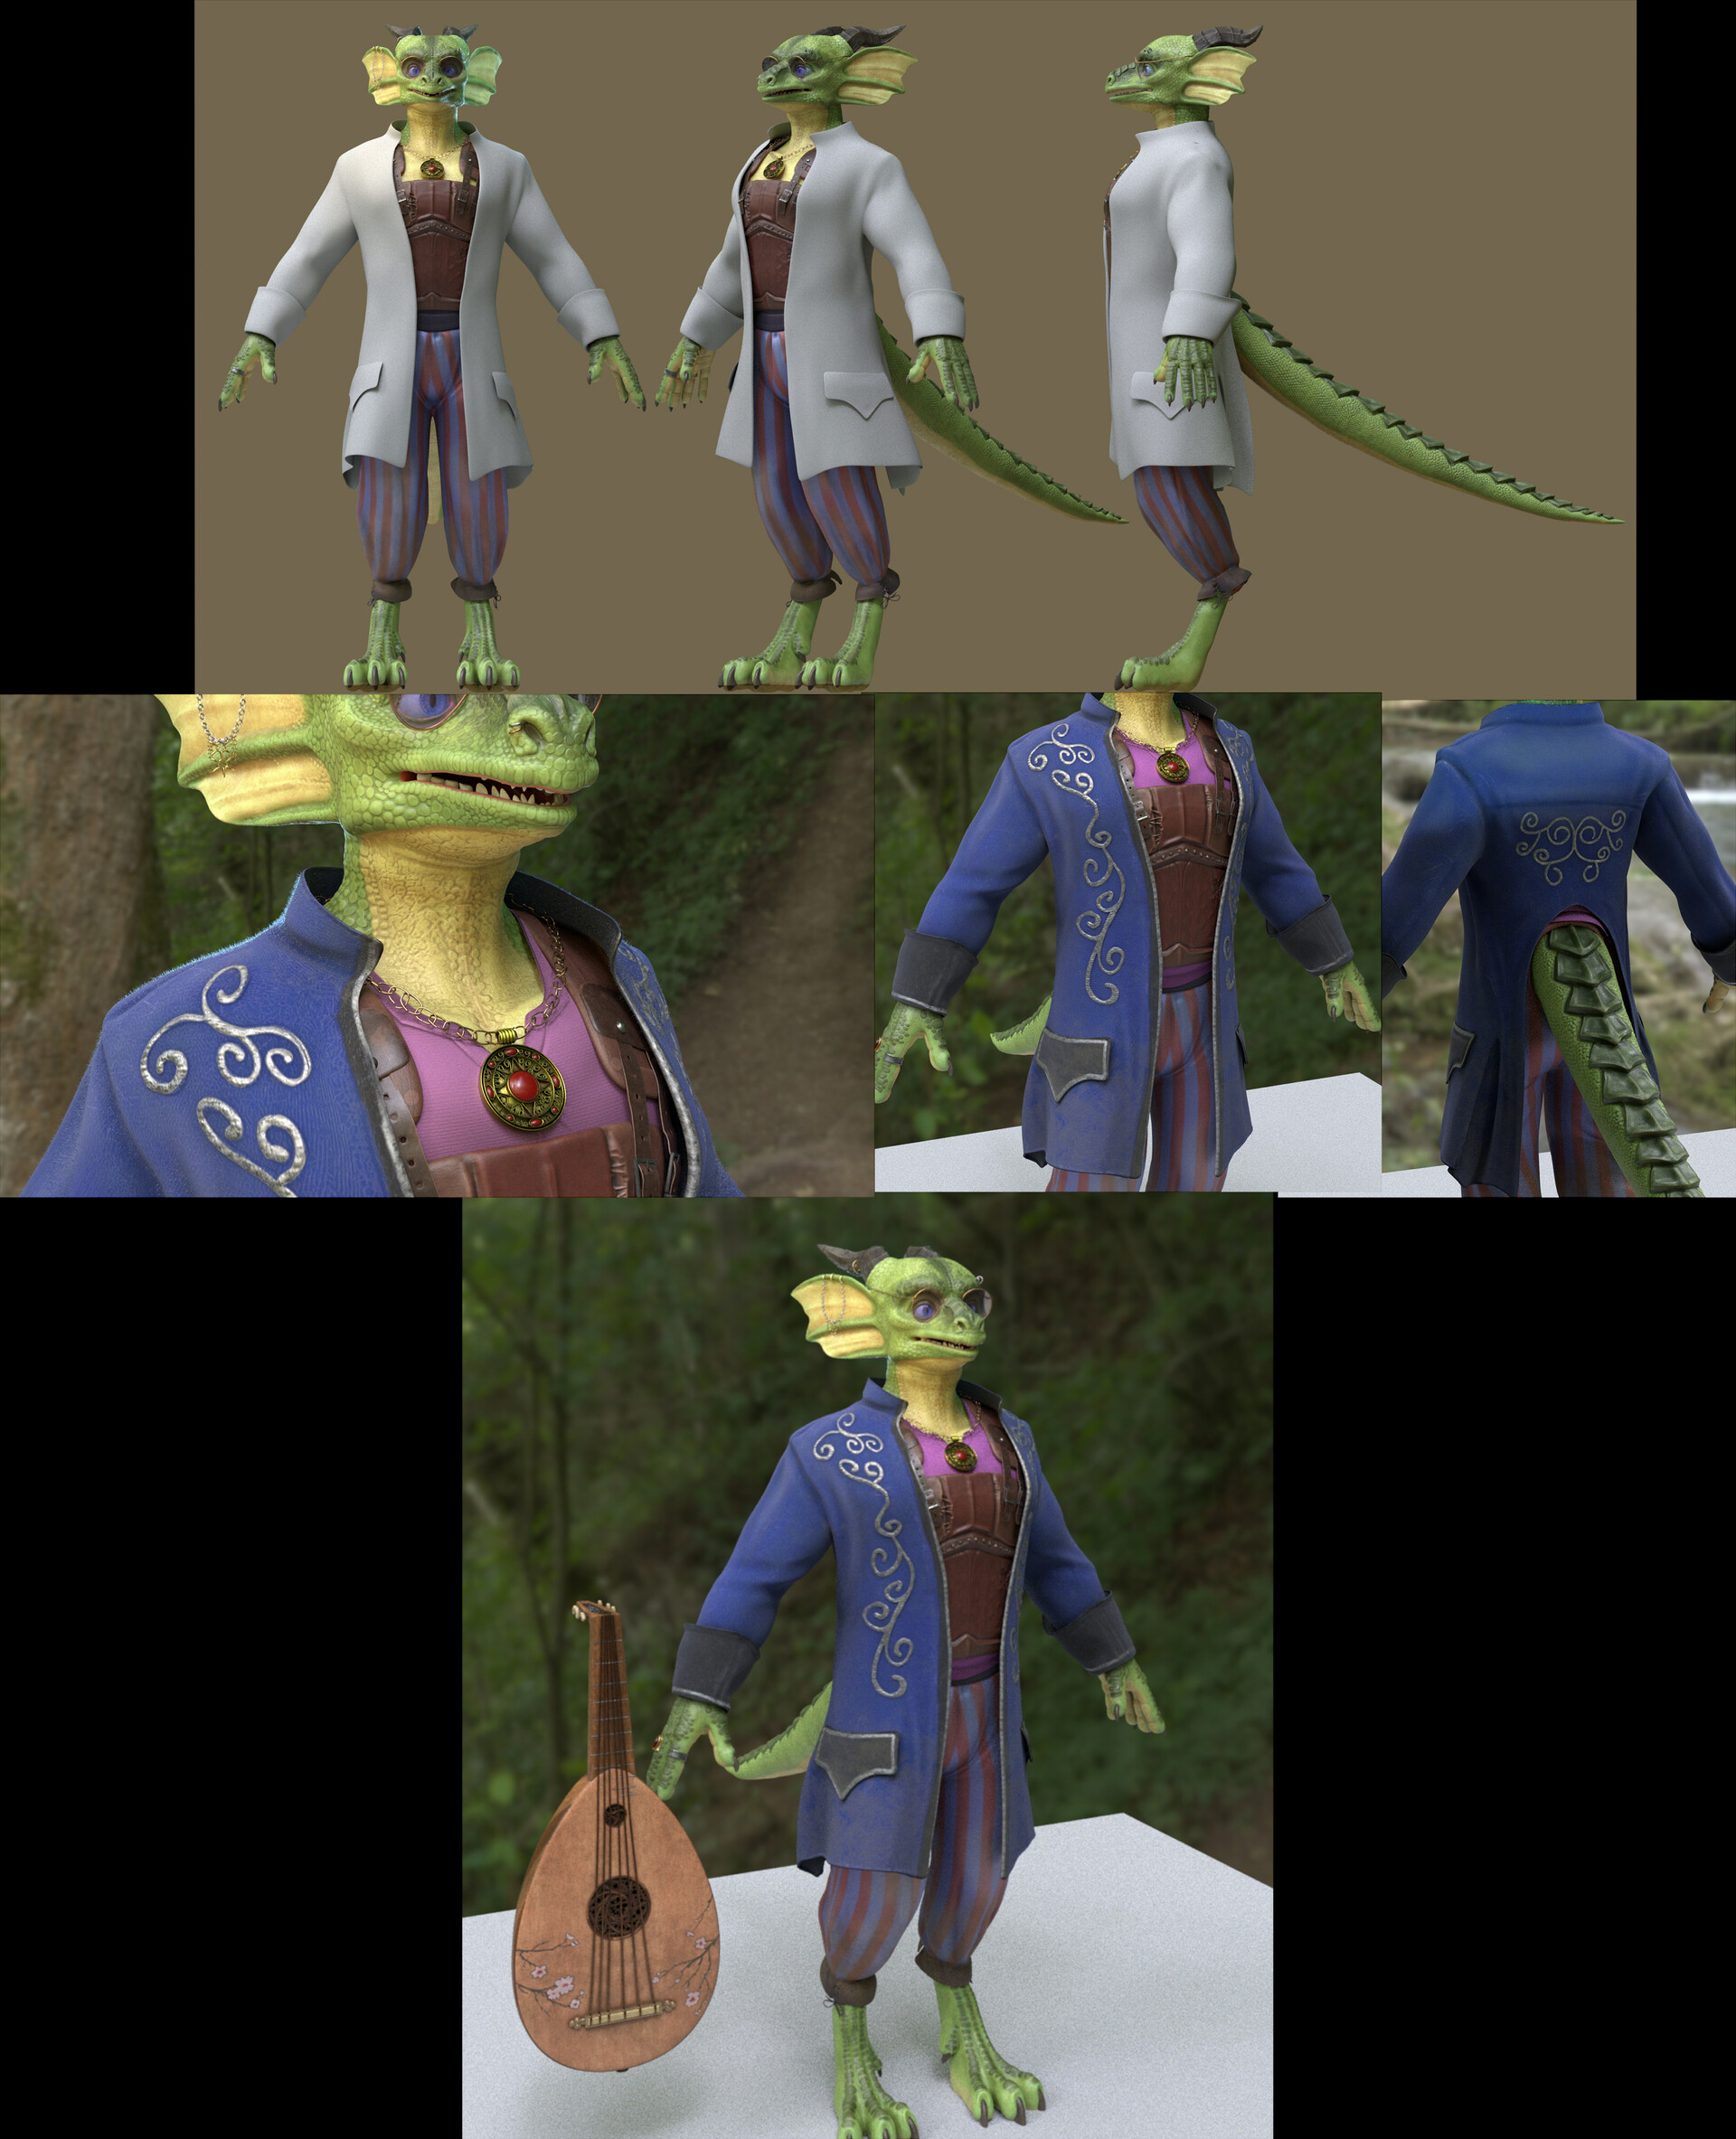
I then took the retopo'd mesh into Marvelous Designer to go about making the outfit. I learned Marvelous through this process, and once I had the clothes to a point I was happy with I retopologized them in Maya before joining the separate pieces.
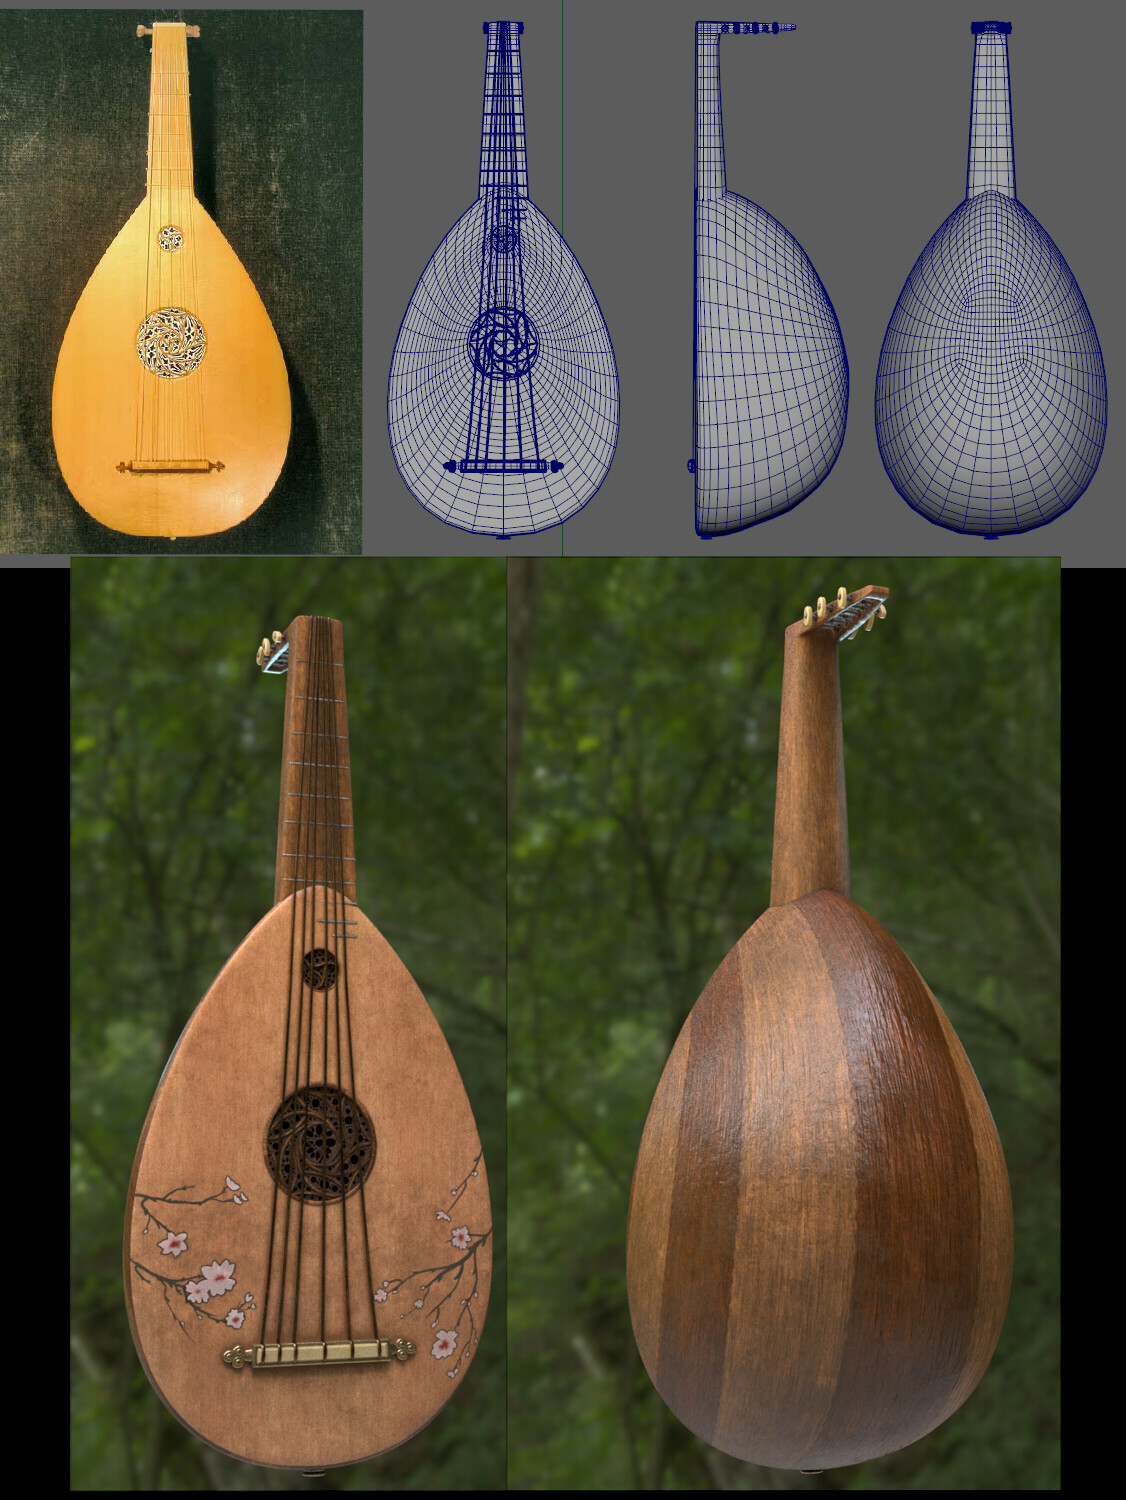
I developed the lute's body as accurate to real life as I could given the references. I then took creative liberties when texturing the lute to make it match the character's overall aesthetic.
I took everything back into Zbrush to make sure the outfit worked well together before sculpting extra details back into the fabric. I eventually departed from the shirt design here to have a more ornate embroidered design.
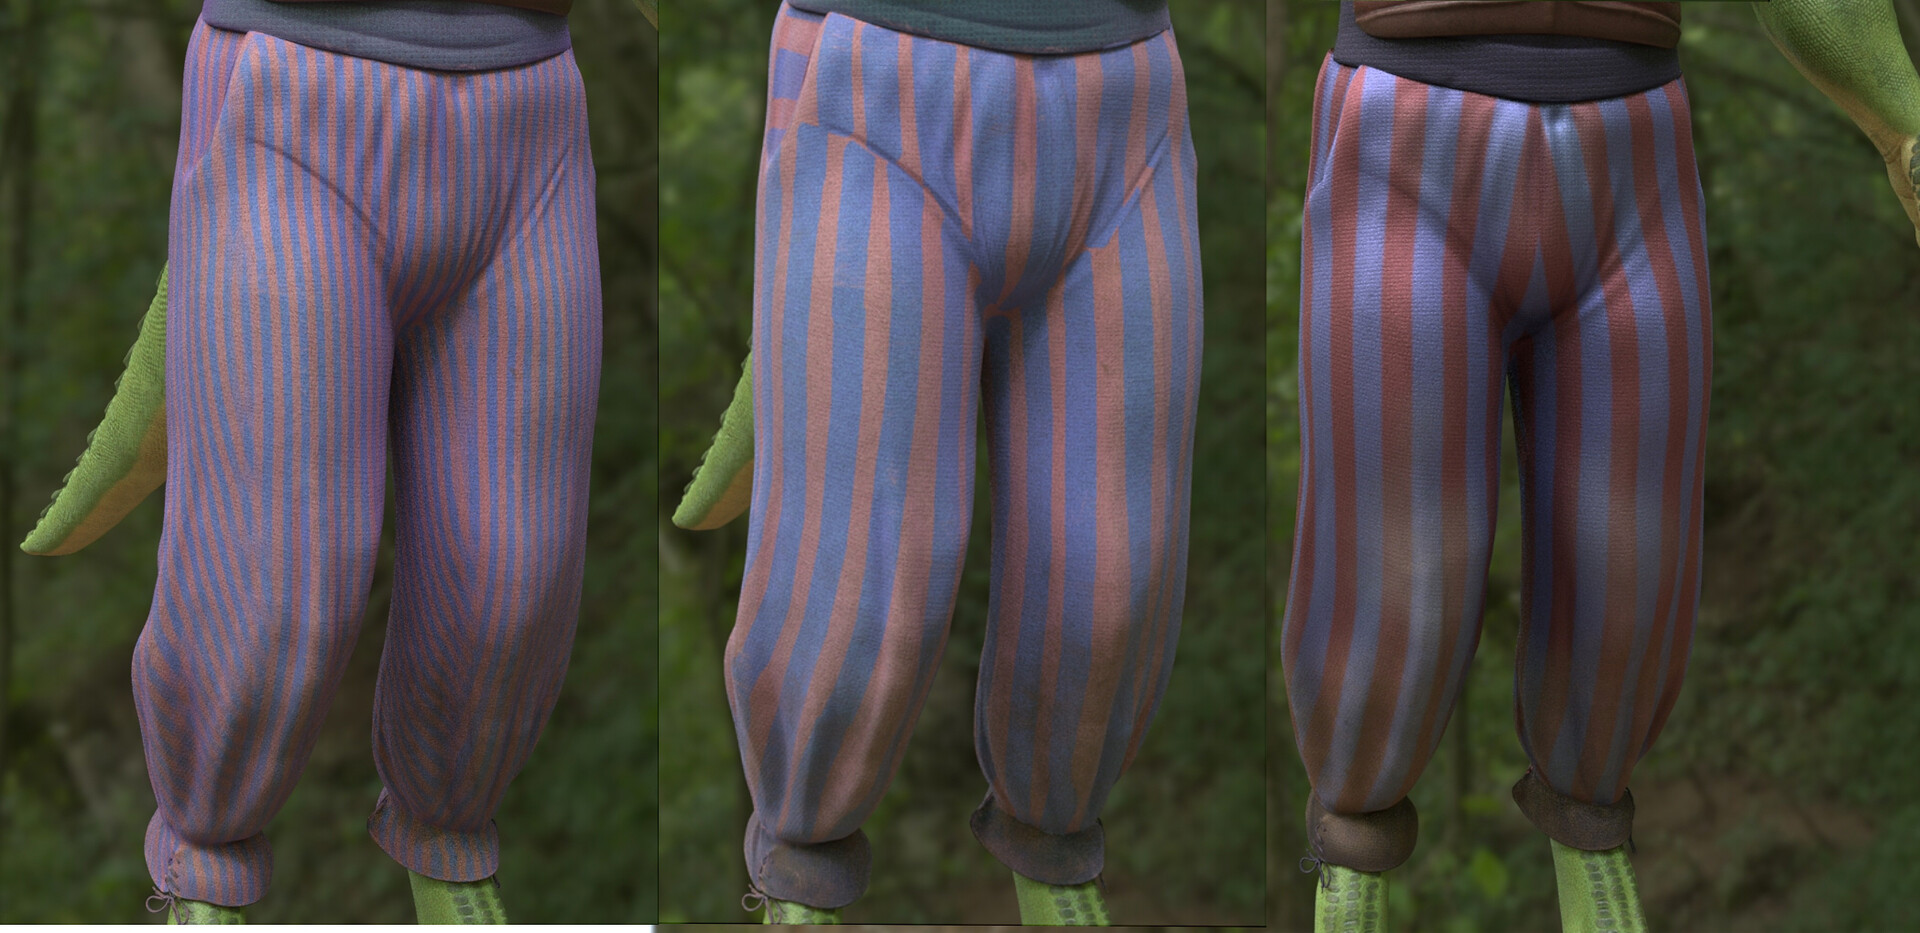
When I could finally begin texturing (my favorite part!), I experimented a lot with the pants before finally settling on a silky, slightly dirty look to sell the idea that he's a traveling performer who lives his life on the road.
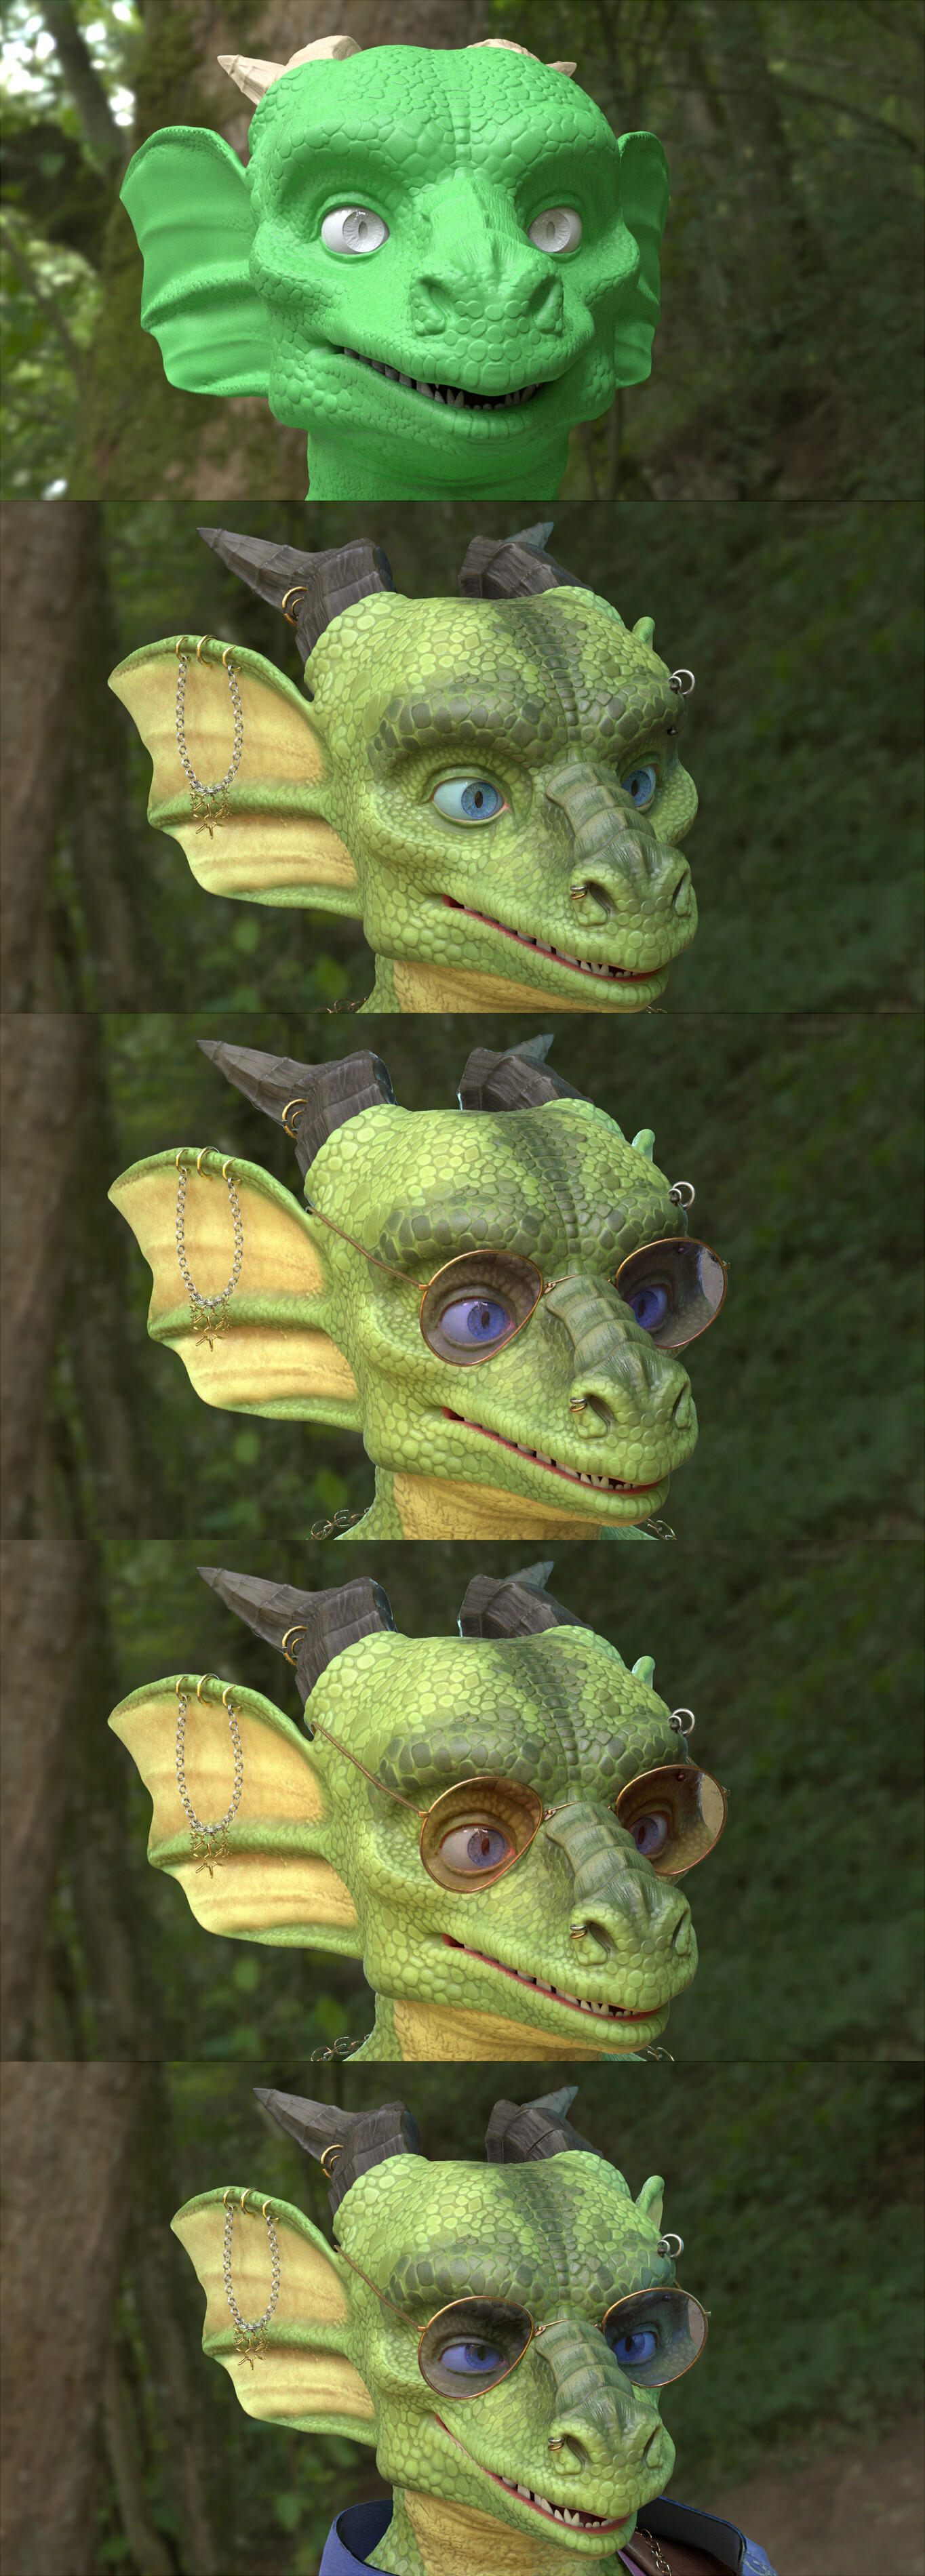
The most rewarding part of the texturing process is always seeing the character come to life. I experimented with a bunch of color and SSS settings before settling on something that worked and made him feel alive.
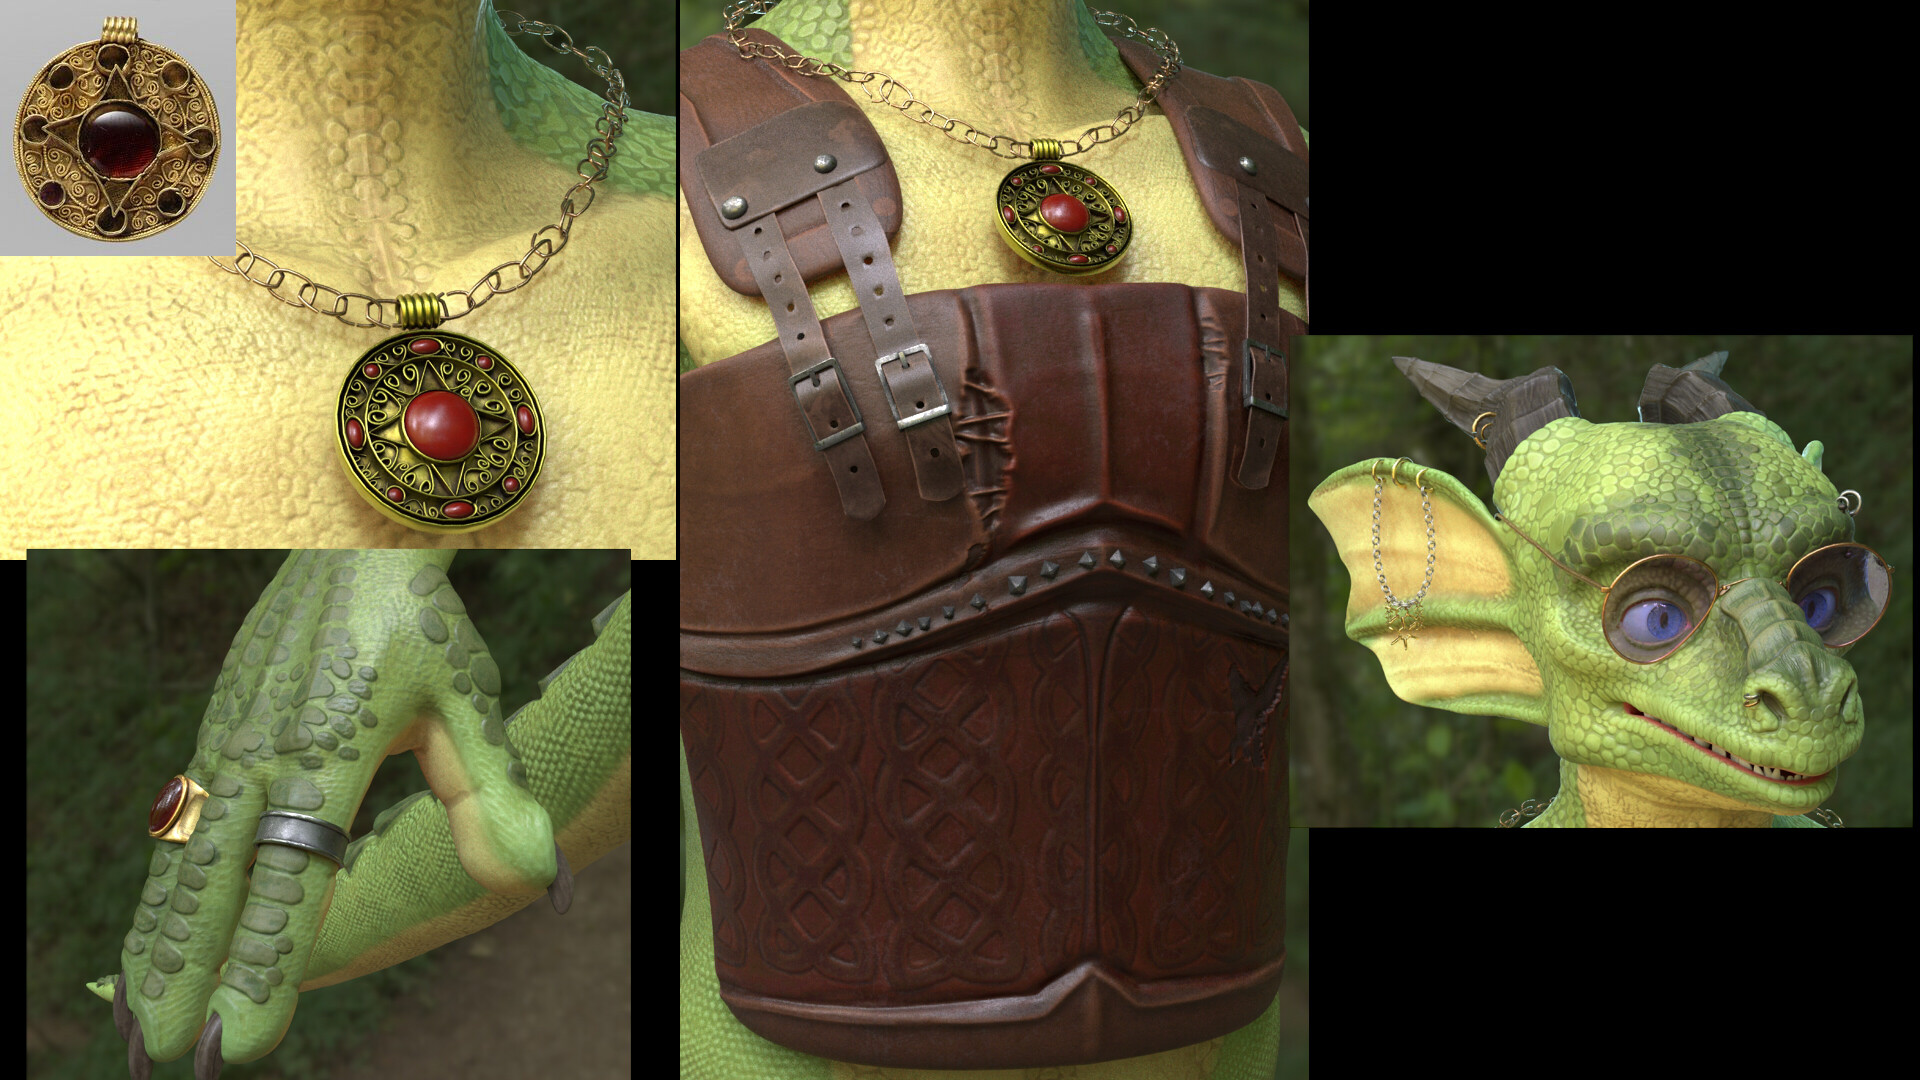
The next step was to focus on the accessories and materials of his armor to make them feel right. The necklace was based on a reference I found when researching medieval jewelry (pictured).
I finished up baking the displacement maps for the clothing and textured the rest of his outfit. I also tried adding fuzz to his jacket with XGen (middle left); this didn't make it to the final version. With that done it was time to move onto posing!
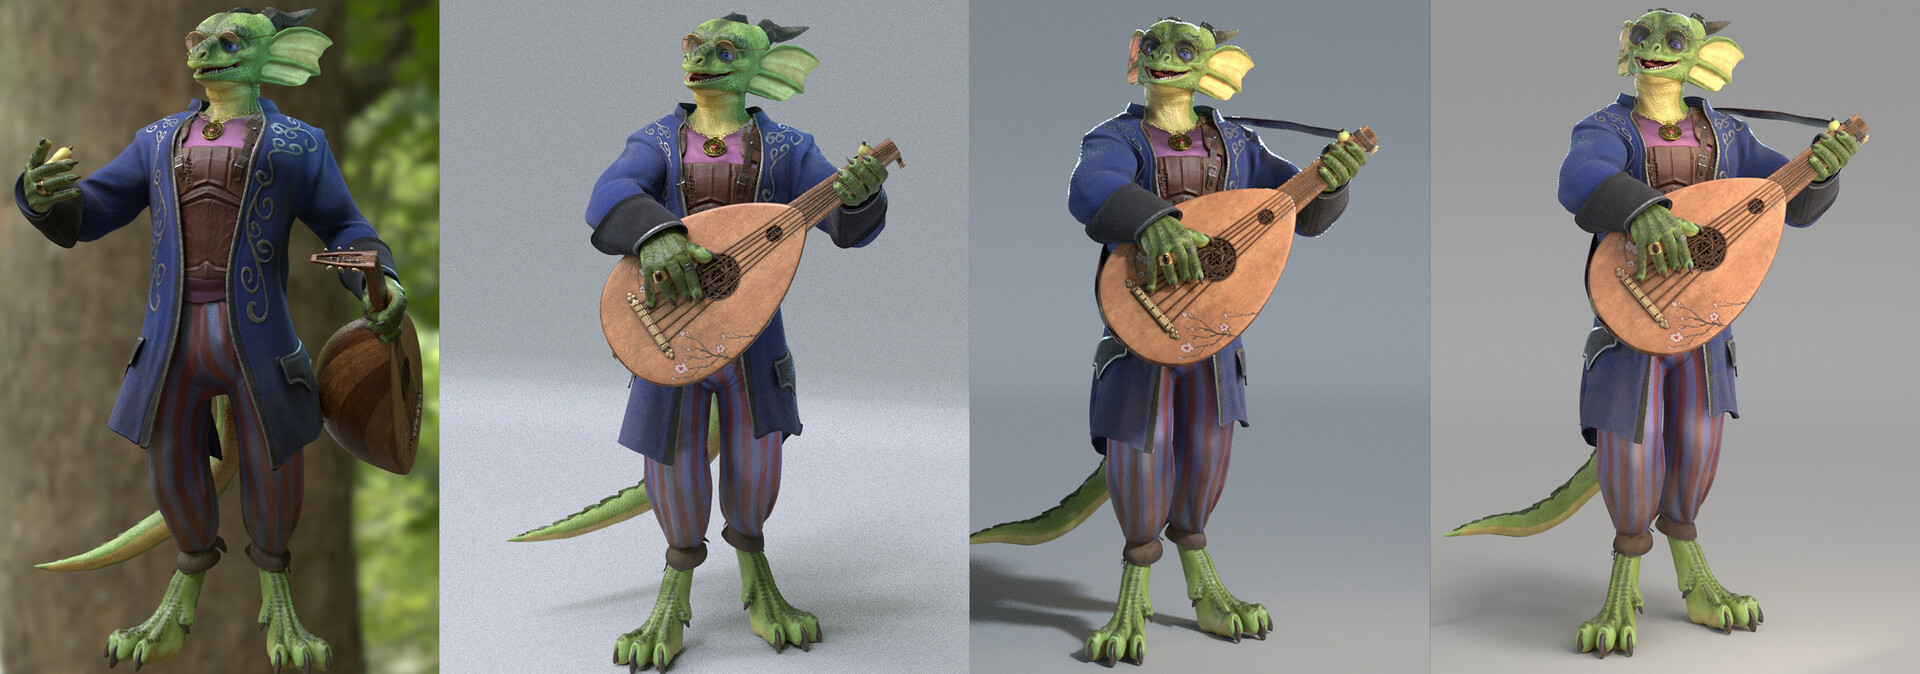
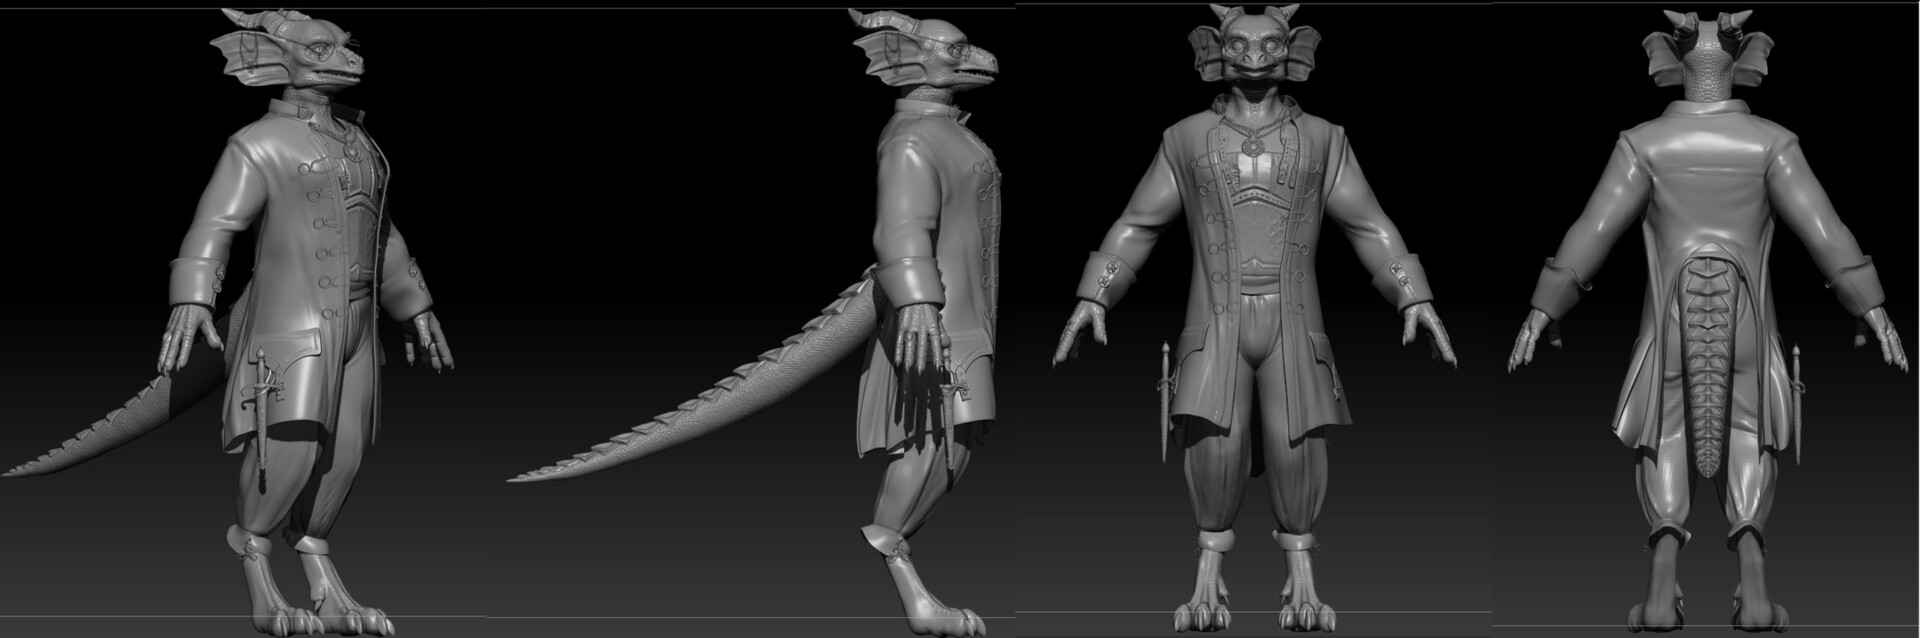
The pose was created by assigning a rough rig to him using Advanced Skeleton. I cleaned up some intersecting geo and corrected the pose manually using Maya's sculpting tools. I experimented with several different poses and lighting setups.
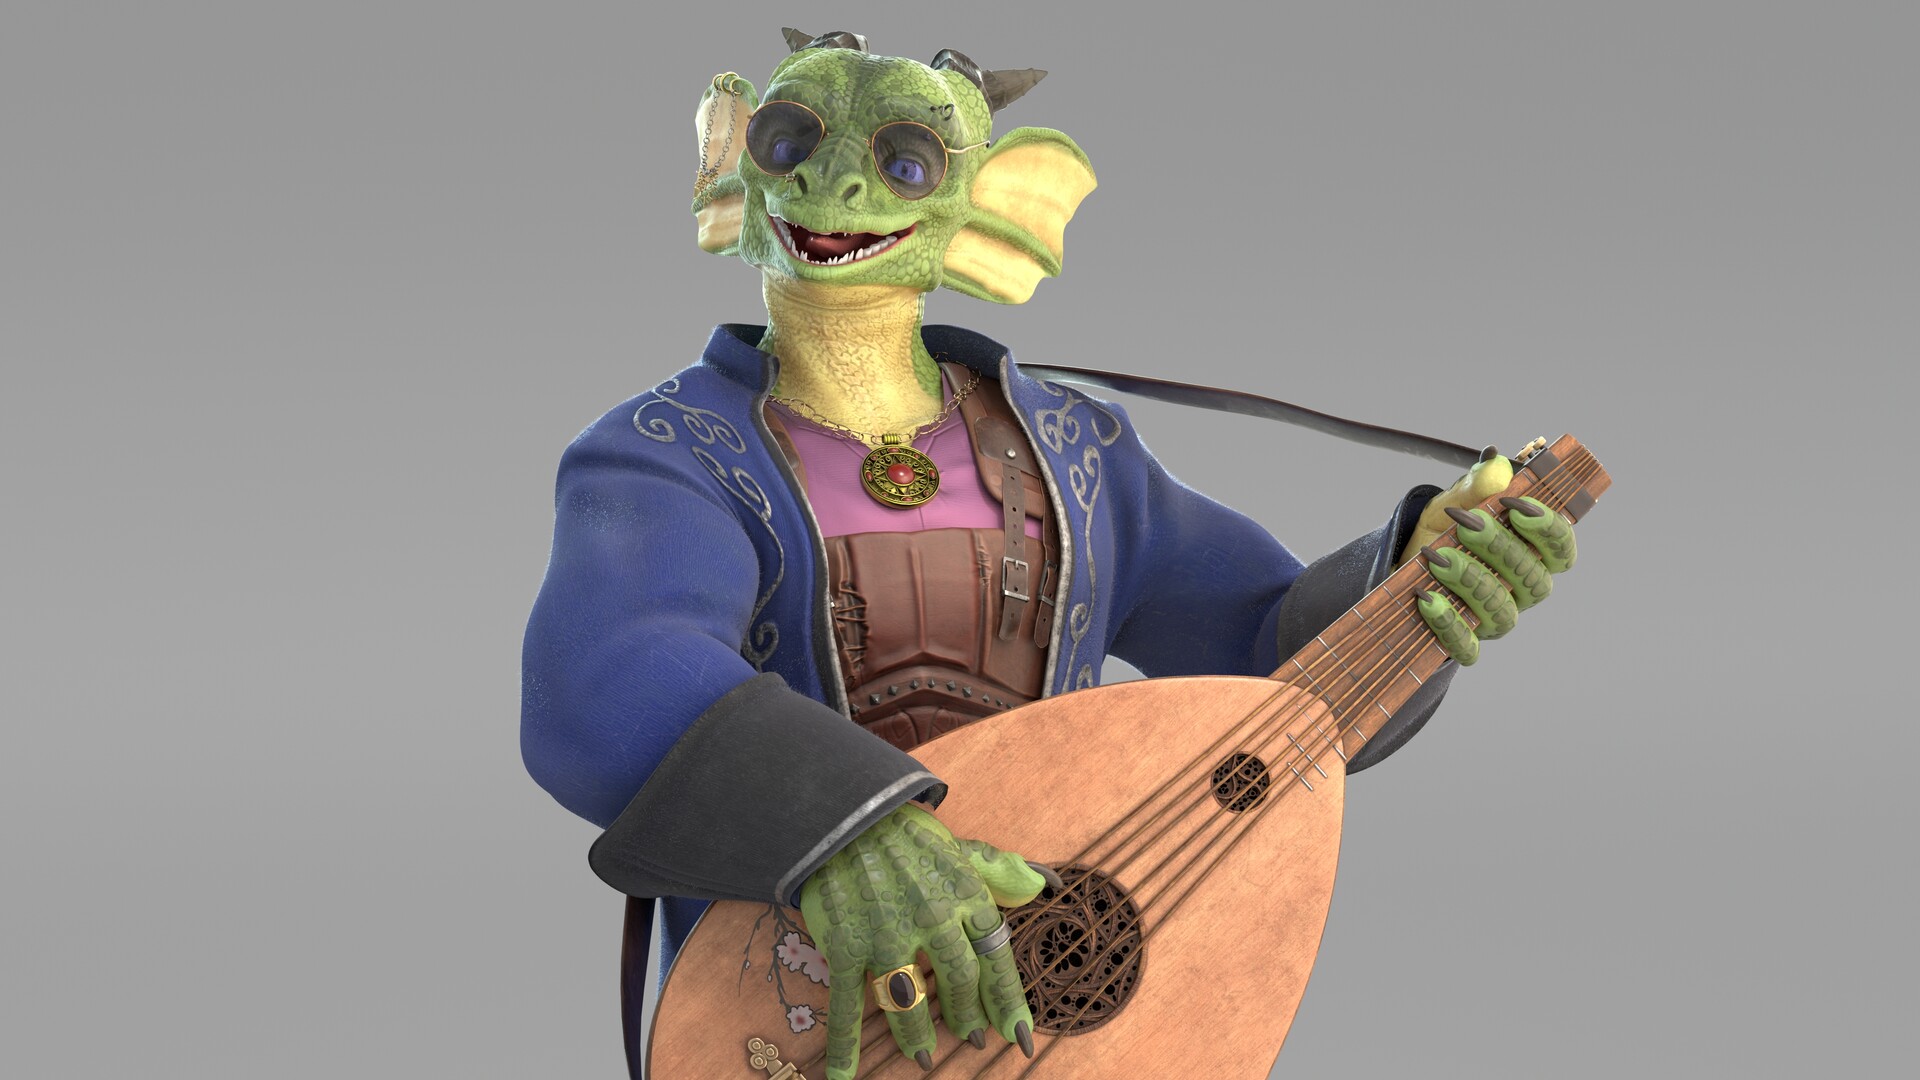
This is a final render showcasing his face and lute.