Skeeter Model
This is a project I've been sitting on since June, when I finished up the texturing. This character began as an in-class assignment (modeling only) before I took him into the final stages of coloring, grooming, and lookdev to push the model and really make it my own.
Programs used include Maya, Zbrush 2019, Substance Painter, Photoshop, and After Effects. Rendered in Arnold for Maya.
Character concept and original illustration by Nik Henderson (https://www.artstation.com/nhenderson).
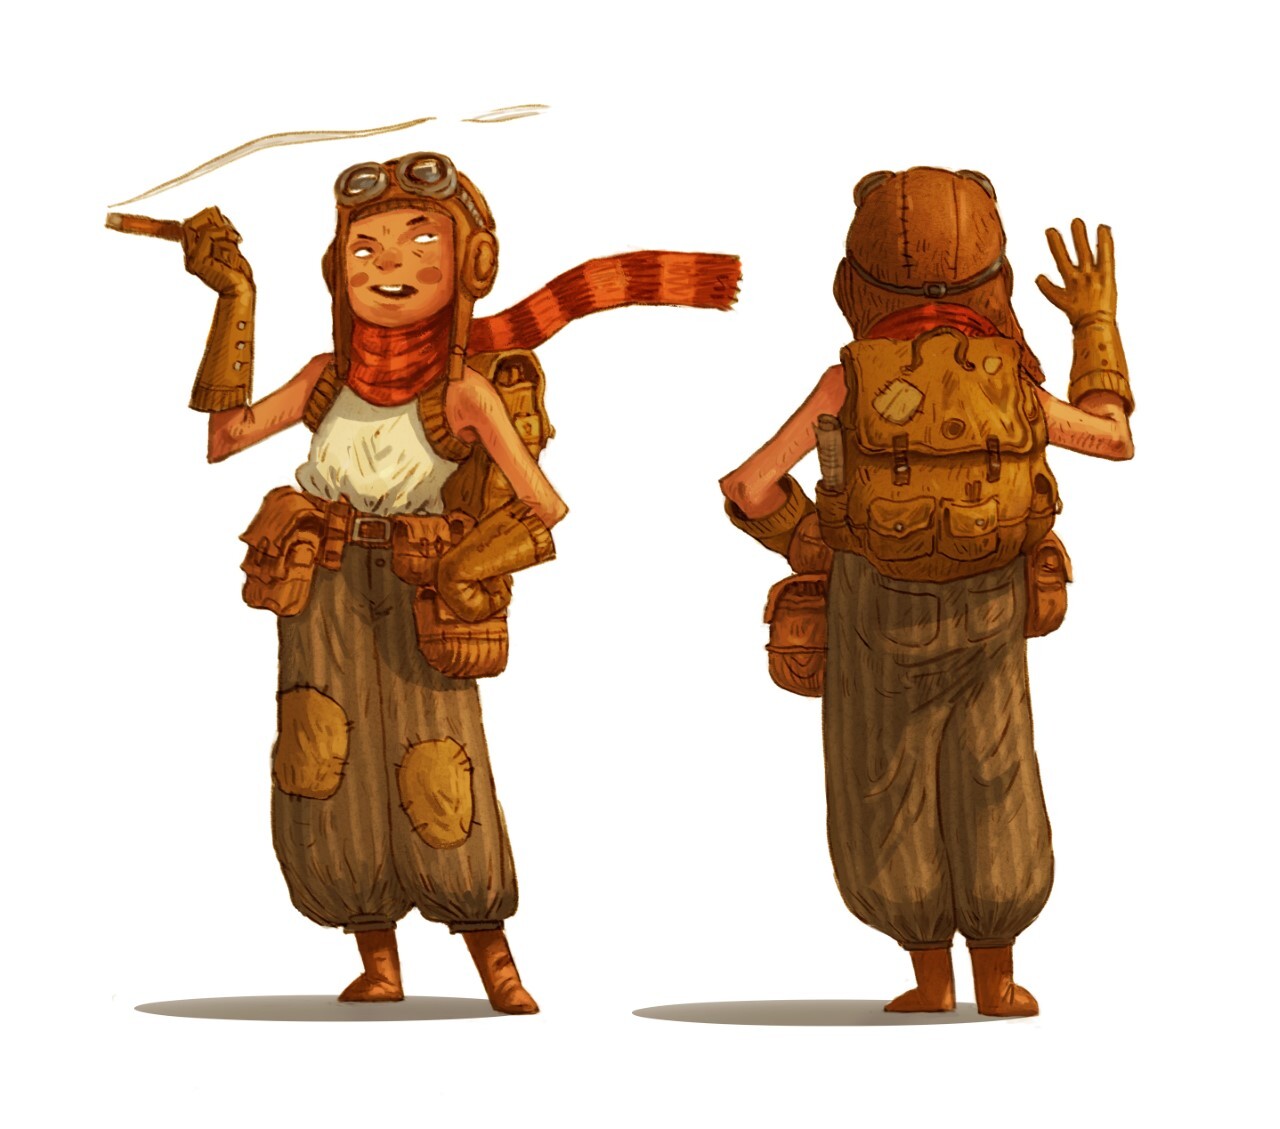
Character concept and artwork created by Nik Henderson (https://www.artstation.com/nhenderson)
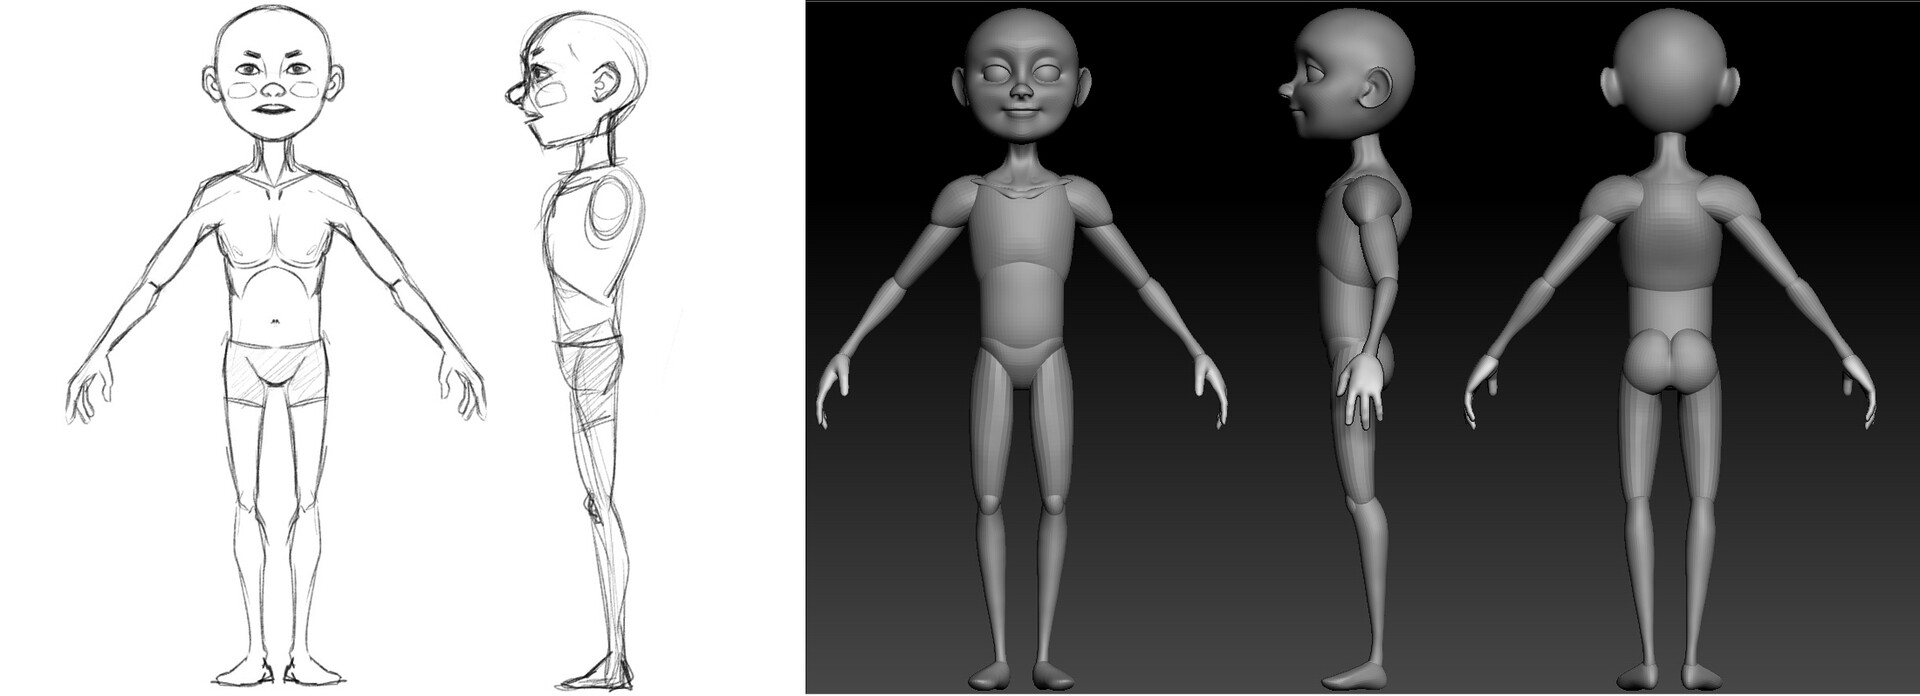
I created a rough initial sketch based on the concept. The hero model was then blocked out in Zbrush using polygon primitives before progressing to the Dynamesh stage.
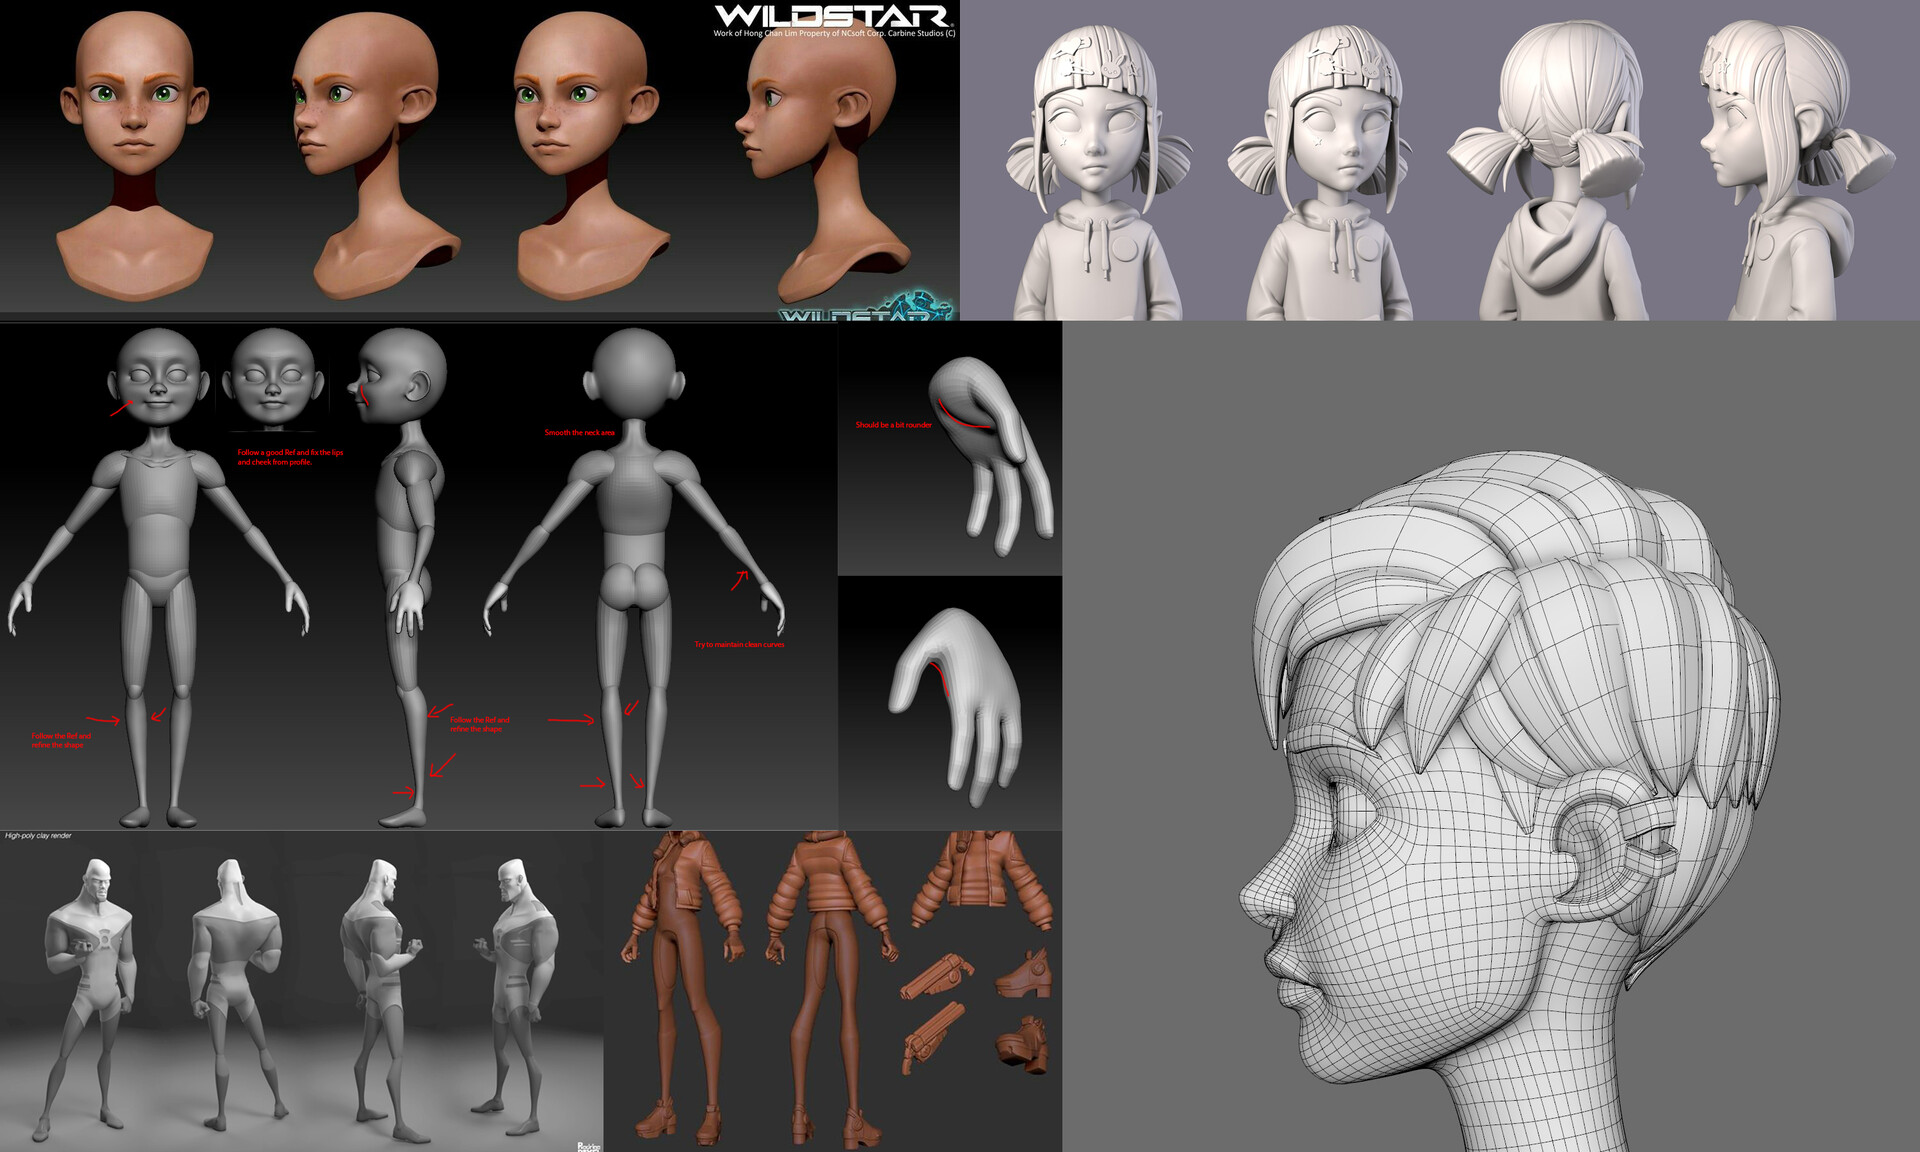
The blocking stage continued through refinement and tweaks, with feedback provided to me from my professor. A great deal of references were used to help me with a stylized final look.
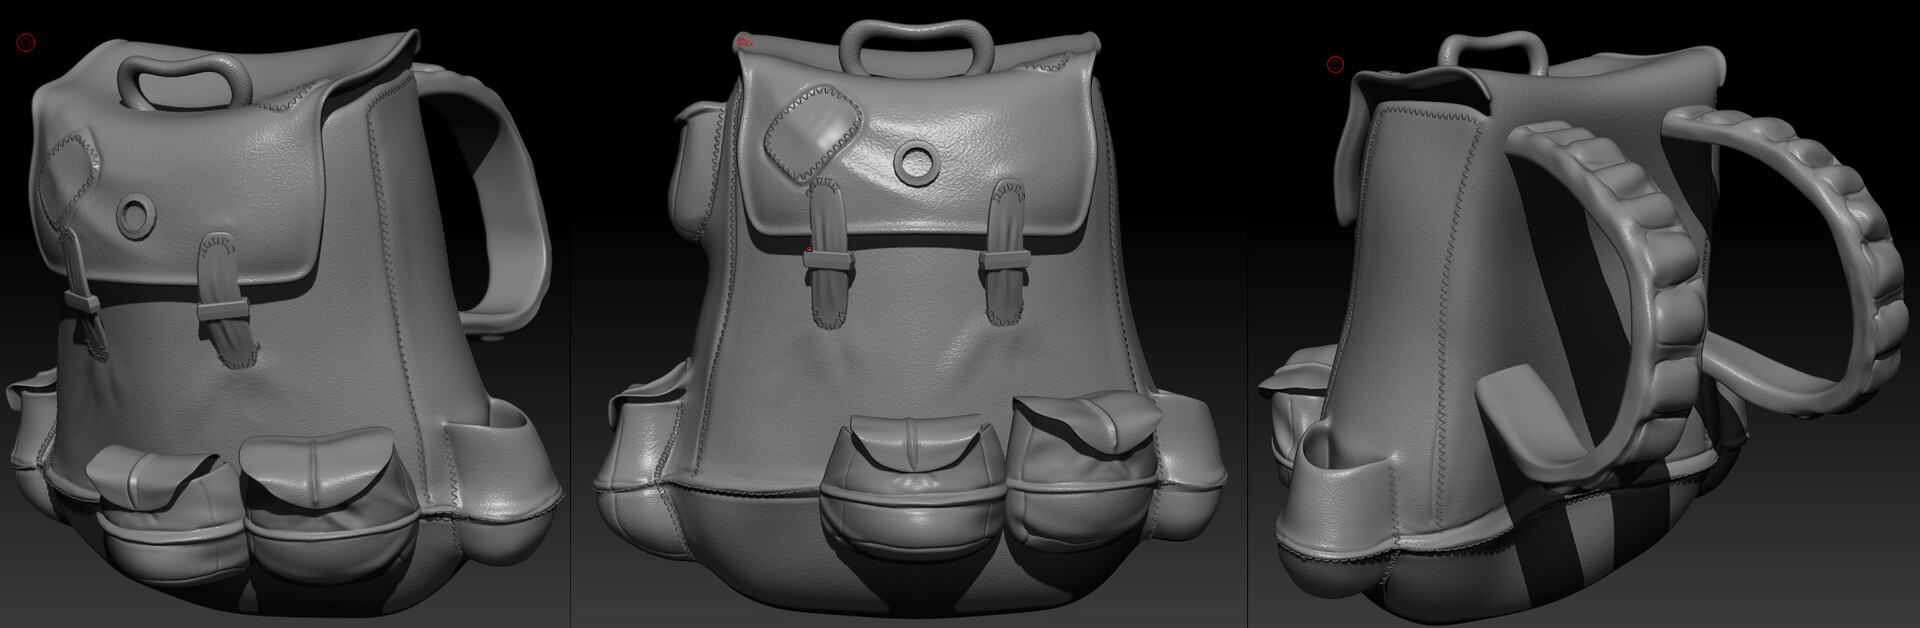
Since the props were an important part of the character and I was on a limited schedule, I worked on them at the same time as the character. The bag was my favorite part of the piece, as it gave me the opportunity to sculpt a bunch of minute details.
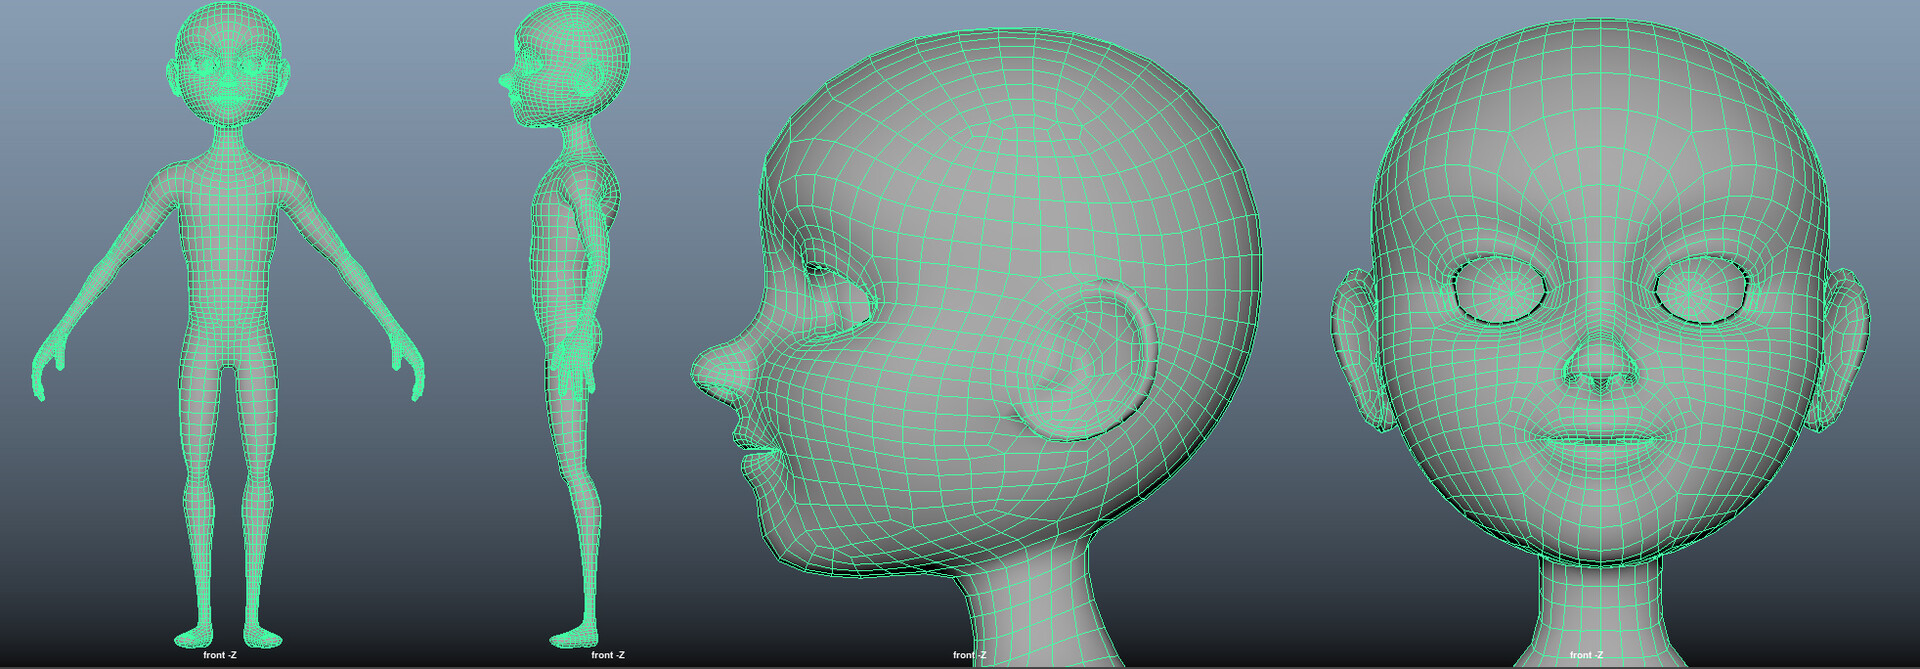
Once the hero mesh had been sculpted out and detailed in Zbrush, I took a decimated version back into Maya and retopologized it. From there I re-projected the details onto this mesh in Zbrush.
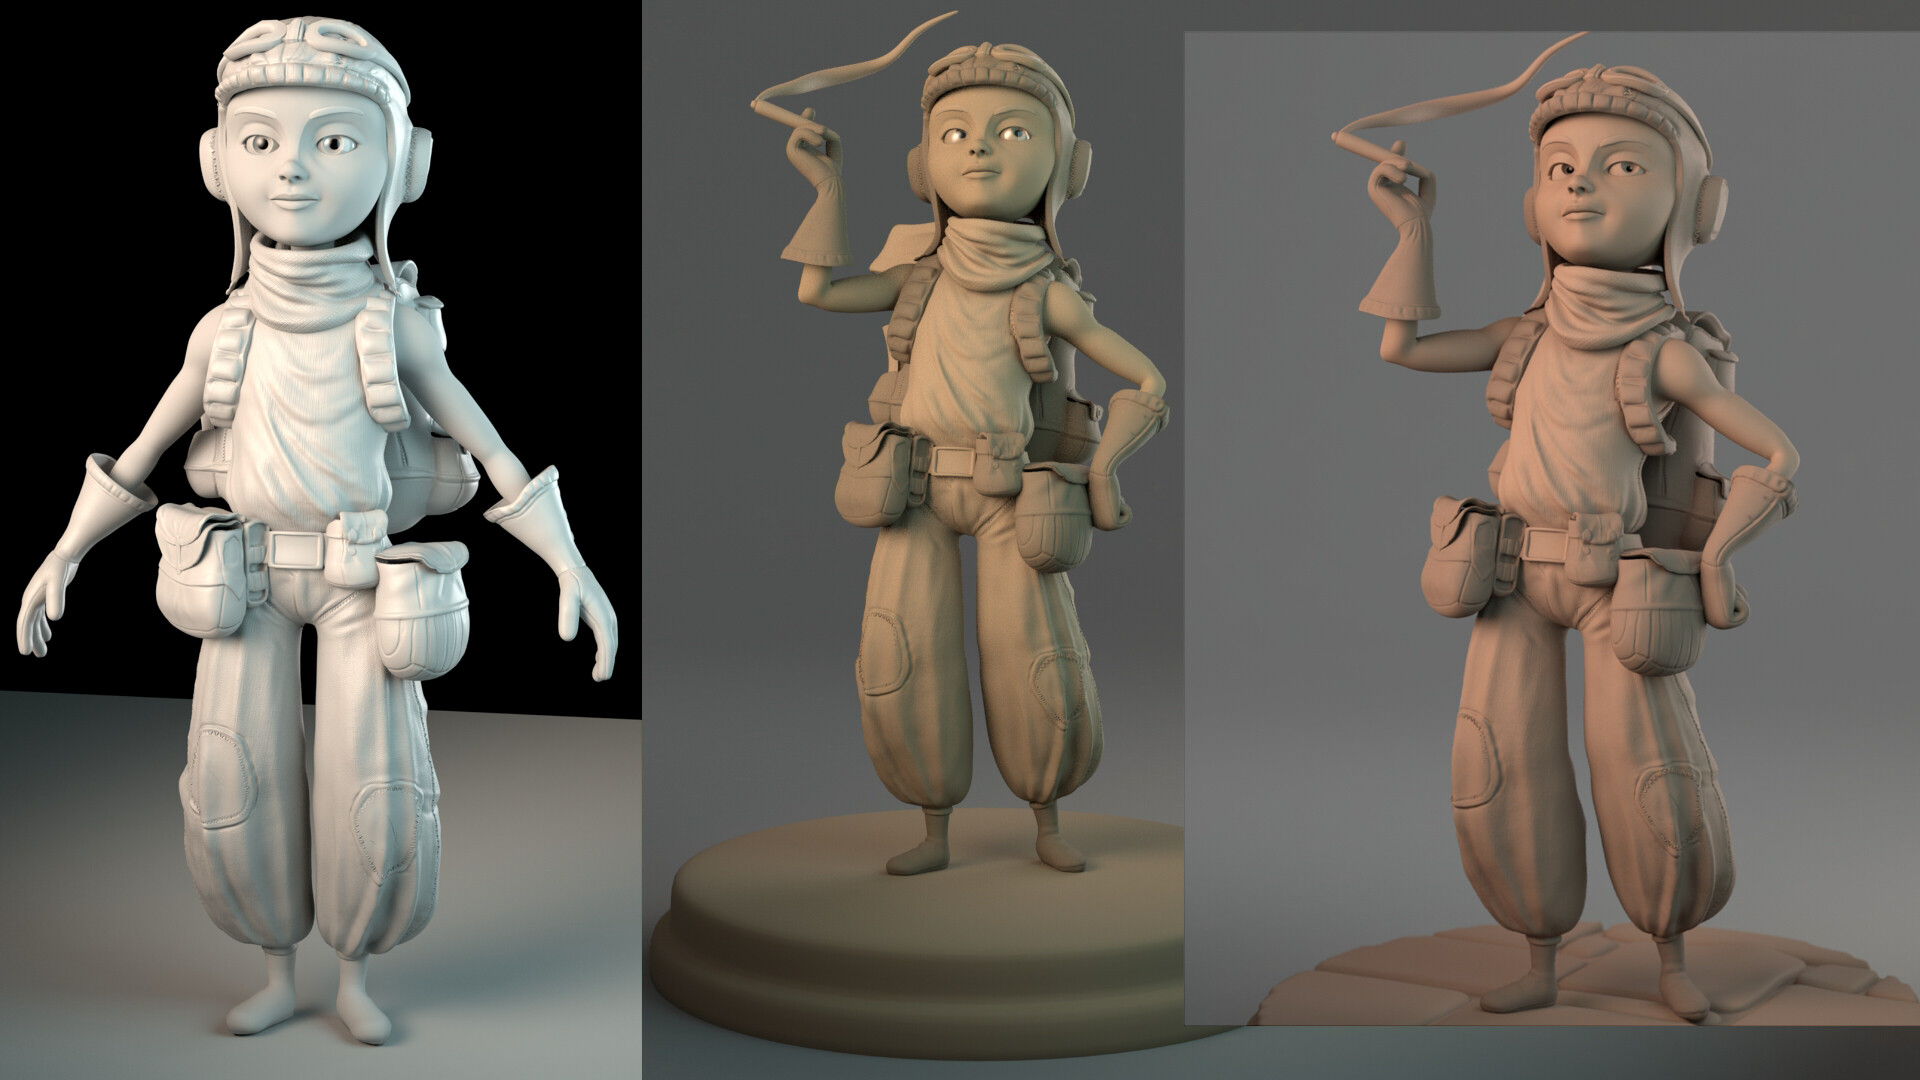
I reassembled the exported geo in Maya and Uvd everything. Then I baked displacement maps from Zbrush and applied them to the materials. From there I refined the clay material and used a quick Advanced Skeleton rig to pose him out for the renders.
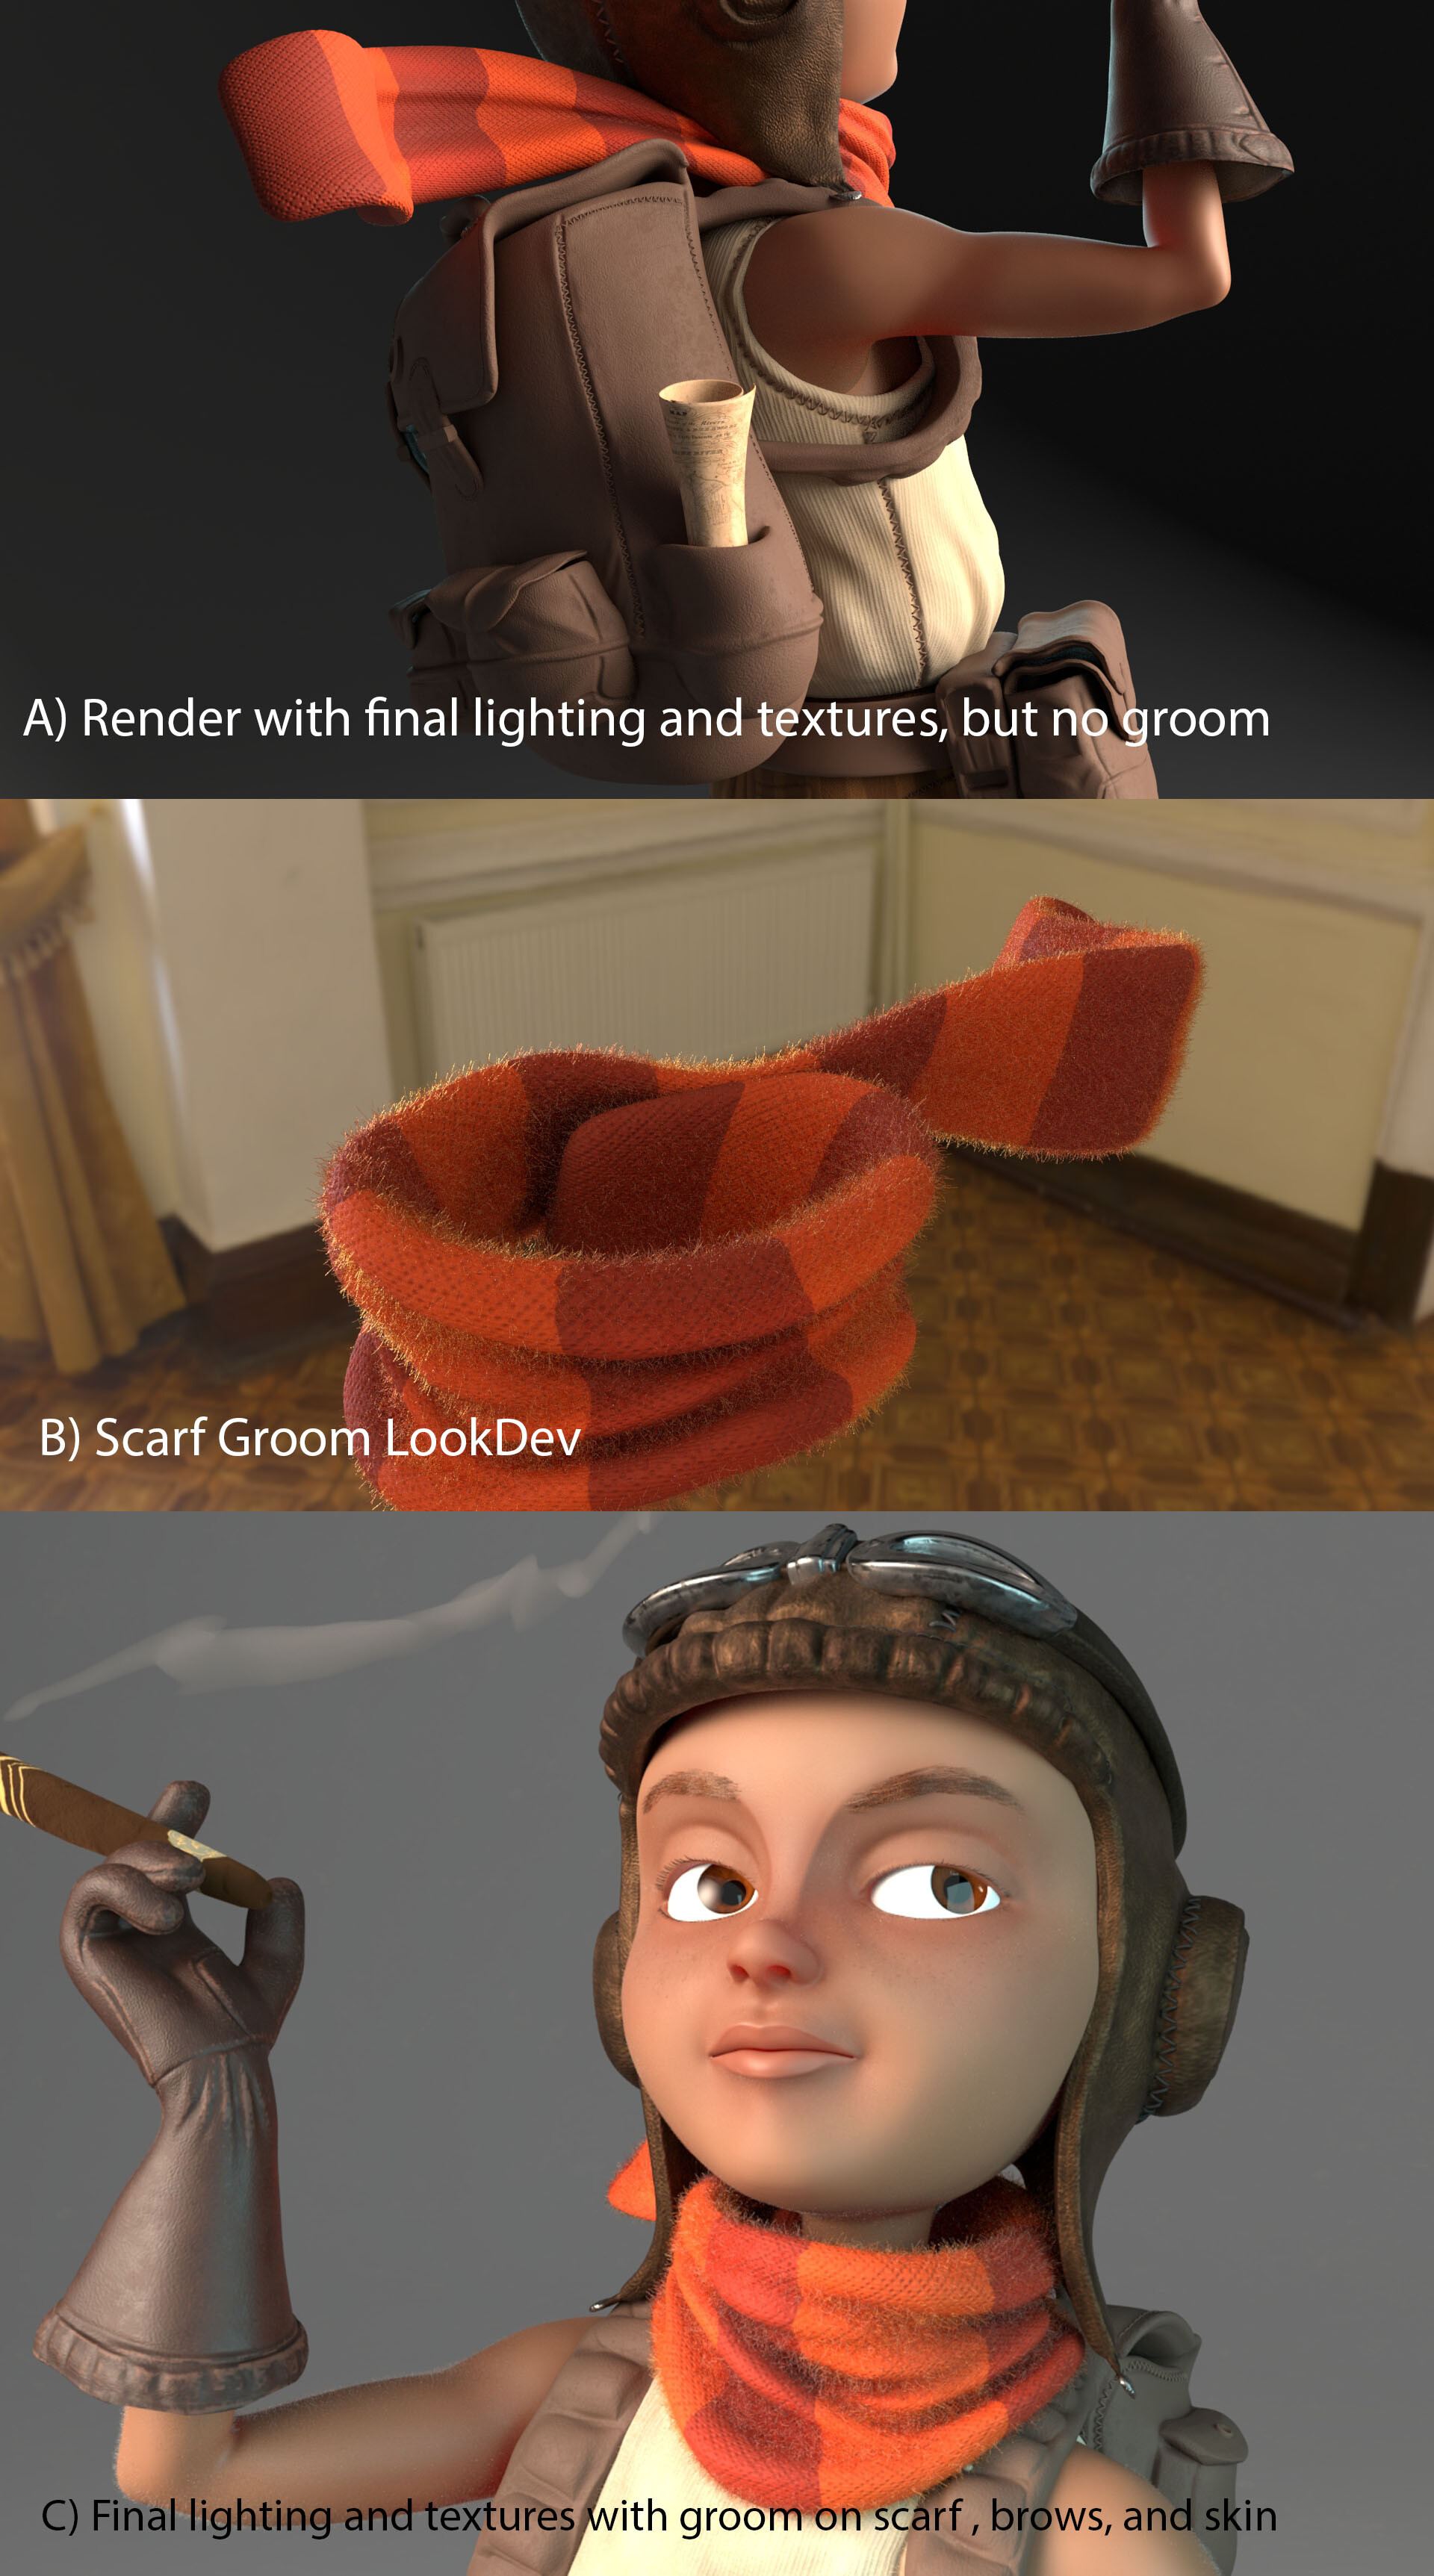
With lighting and texturing final, I began to add grooms to the scarf, body, and eyebrows.
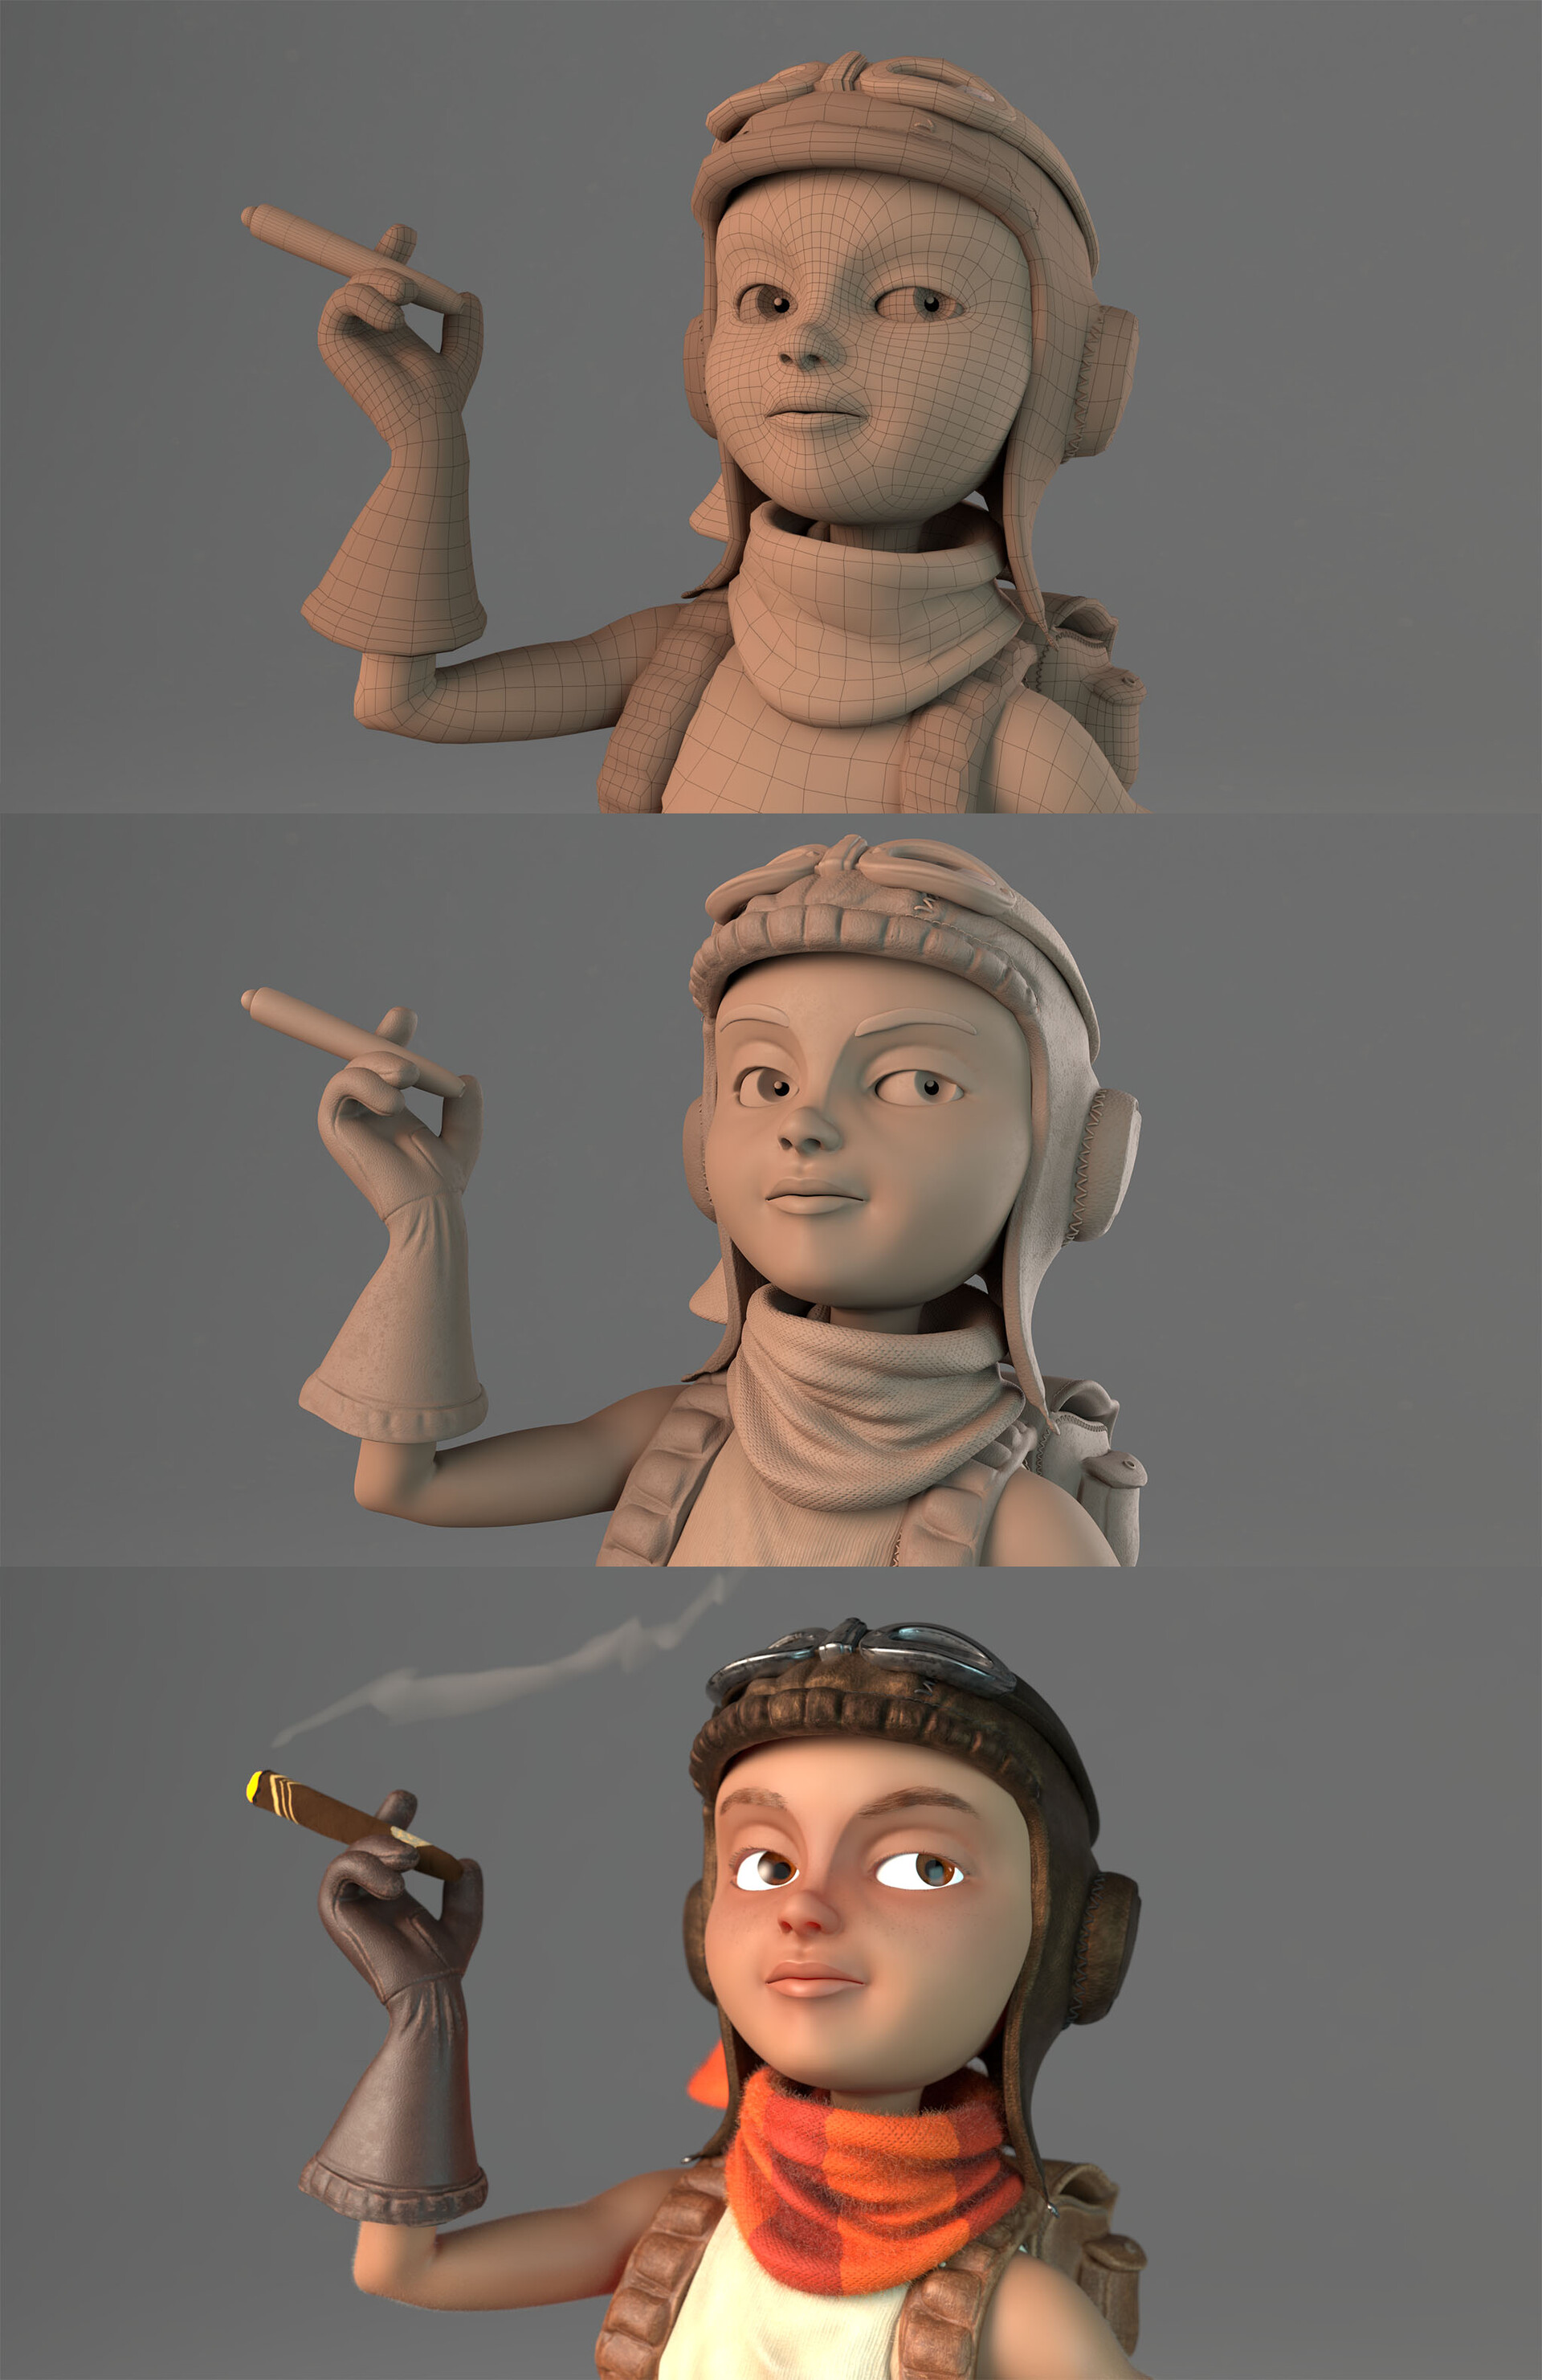
Comparison of the final renders for the face of a wireframe, clay shader, and final textured pass.
This is the final turntable of the wireframe, clay and colored shader passes.